
Paint correction through machine compounding and polishing is the only way to make your vehicle’s finish as near perfect as possible. You cannot effectively remove or reduce swirl marks, scratches, and oxidation by hand without significant time and strenuous effort, and the results will not be as drastically improved as you will achieve with a random orbital machine polisher. When many people hear the term “paint correction”, they may think of things like fixing rock chips, repainting panels after a car accident, and so on, but in the detailing community, this is not what we mean by paint correction. Paint correction is the process of using a machine polisher with various pad types, compounds, and polishes to remove or greatly reduce blemishes in the vehicle’s finish, such as swirl marks, oxidation, fine scratches, stains, and water spot etching.
Using a machine polisher is arguably the most intimidating part of detailing if you have never used one before. We’re here to tell you that many of those fears should be put to rest after reading this article and watching our instructional video. Many of our customers are very hesitant or refuse to put a polisher to their vehicle, until they have a polisher in their hands and try it out on a demo panel at one of our shows, or even on their own vehicle at one of our detail clinics. In this write-up, we’ll break things down into easy to understand topics to ease any anxiety you may have and feel confident in perfecting your vehicle’s paint! We’ll cover choosing the right polisher, explain our machine compounding and polishing chemical options and which pads are suitable for each, and then provide an overview on technique, as well as some additional information on types of paint and their hardness and levels of thickness.
Understanding
Machine Polishing
Introduction
What Is A Swirl?
We mentioned “swirl marks” a few times in the introduction, but some may not be familiar with this term. Swirl marks are a type of faint circular or oval scratch pattern that appear almost like spider webs on the surface of the paint. They are sometimes referred to as cobweb scratches as well. They are caused by automatic car washes with brushes, dusters, cotton bath towels, and even rotary buffers with an aggressive wool pad. When it comes to rotary buffers, they can also be referred to as holograms or buffer trails, due to the way they shimmer and appear on the surface. Swirl marks are typically only into the top clear coat layer of the paint job. They can sometimes be very easy to fix and sometimes require much more effort to fix. We’ll discuss paint types and hardness levels later in this write-up.
Once you have swirl marks removed, deeper scratches in random spots will become more apparent. These are known as Random Isolated Deep Scratches (RIDS). These scratches can be down into the clear coat, or deeper into the base color coat, and sometimes all the way into the primer or metal. Machine polishers can typically fix or greatly improve scratches in the clear coat. Deeper scratches may require wet sanding before polishing, but that is an advanced technique that we will not get into in this article. Scratches into the primer and deeper will require a repaint at a bodyshop to fully fix the issue.
Different Types Of Polishers
We have several machine polisher options depending on what type of vehicles you will be working on and how often you will be polishing. All of our Swirl Killer Polishers are variable speed Dual Action (DA), or random orbital polishers, with the exception of the Swirl Killer Pro Micro, which can be swapped between random orbital and rotary heads. But first things first, we need to explain what we mean by the terms dual action, random orbital, and rotary. Random orbital and DA are generally interchangeable terms. Random orbital means that the polisher head oscillates, or shakes back and forth, in multiple directions rather than a circular spinning motion only, like a cordless drill.
Random orbital polishers mimic the slightly imperfect old school orbiting motion of your hand as if you were applying polish with a hand applicator, but at a much faster rate of thousands of orbits per minute (OPM). They are the safest type of machine polisher, since the free-rotating polisher head and oscillating movement keep the pad and vehicle surface cooler and prevent you from burning the paint, or more accurately, striking through the clear coat. DA’s are the most comfortable to use, since they are very controllable and will not “walk” or run across the panel when you apply power to the machine like rotary buffers will do. Lastly, random orbital polishers offer the best finish, with the least chance of micro-marring (very tiny 1mm faint scratches) and zero buffer trails or hologramming that you get with rotary buffers.
With rotary buffers, they used fixed rotation, meaning that the backing plate and pad only spin like a circular saw motion and do not oscillate. Rotary buffers usually operate at higher speed, and the single spinning rotation will generate significant amounts of heat quickly - it is very easy to burn or strike through clear coat very quickly with a rotary buffer if you do not have experience using this type of buffer! Because they only have one spinning direction, they can cause buffer trails in the finish, which look like shimmering snake-like patterns, if you are using improper technique or uneven pressure. The benefit of rotary buffers is that they cut very fast and do heavy amounts of correction in little time, so they’re best suited for body shops that are doing an initial wet sanding and aggressive cut on a fresh paint job. Then you can refine the finish with a random orbital machine. The last type of machine is a hybrid polisher - that has the oscillating pattern of a DA with forced rotation of a rotary. These machines have strong correcting ability but can still be a little unwieldy for a first time user. We do not currently offer any hybrid polishers.
Which Machine Is Right For You?
Now that we have an understanding of the different styles of machine polishers, we’ll provide an overview of the machine options that we offer under our line of Swirl Killer Polishers to help you determine which polisher(s) will best suit your applications.
Swirl Killer 15mm
Adam’s Swirl Killer 15mm is our most commonly used polisher for many and is an excellent choice for a first polisher. It uses Velcro-backed 5.5” pads, which are a nice overall size for most cars, trucks, and suvs that usually cover 75% of painted surfaces or more on a vehicle. The 15mm in the name refers to the orbit throw of the machine, meaning that it is a long-throw polisher that oscillates 15mm in multiple directions. It features a slow-start trigger with variable speed of 1-6, from 2000-4500 orbits per minute, which both allow for very easy control. It is a reliable workhorse - we use the Swirl Killer 15mm on hundreds of cars each year as the official detailers of the Barrett-Jackson Collector Car Auctions.
Swirl Killer 12mm Mini
The Swirl Killer 12mm Mini is a small but powerful dedicated 3” polisher with a 12mm throw. It uses smaller 3.5” pads that can reach even more areas than the 15mm polisher. The smaller casing of the Mini makes it ideal for accessing tighter areas such as headlights, mirrors, pillars, complex bumper curves, and so on. It has speeds of 2500-5500 OPM, so the higher speed combined with smaller pad diameter allows it to do very significant levels of correction, since you are focusing the compounding work into smaller areas at a time. The Mini polisher is another option that if you were to choose only one polisher, it is highly recommended with a very affordable price. Adam often mentions that “You can polish an entire car with the Mini, it will just take longer.”
Swirl Killer 21mm
Adam’s Swirl Killer 21mm is very similar to the Swirl Killer 15mm, but with a massive 21mm throw orbit that uses larger 6.5” pads to make short work of compounding, one-step, and finish polishing. The 21mm is ideal for use on long, flat body lines, such as panel trucks, vans, trailers, and so on. This would make for an excellent secondary machine or backup polisher if you are starting a detailing business.
Swirl Killer Pro 15mm
The Swirl Killer Pro 15mm is an upgraded, professional version of the Swirl Killer 15mm. It uses the same 5.5” pads, but has a stronger motor for less stalling on complex curves, near-zero vibration, and quieter operating noise levels. It has a progressive trigger, 1000 watt motor, comfortable rubber grips, improved cooling, detachable power cord, and an integrated polishing light. This is without a doubt our most powerful machine polisher, and is a great choice if you will be paint correcting multiple vehicles with tighter time constraints in a business environment. It is a very capable machine - safe and easy to use for beginners and experienced professionals alike.
Swirl Killer Pro 12mm
The Swirl Killer Pro 12mm is our second professional grade polisher option. It is an upgraded version of the Swirl Killer 12mm Mini. This mini polisher uses 3.5” pads and features many of the same enhancements of the Pro 15mm - stronger motor, reduced vibration, quieter operation, more comfortable grip areas, and improved cooling. The detachable power cord is the same design as the Pro 15mm, so it is interchangeable between both polishers, which is a very convenient feature that reduces down-time when paint correcting.
Swirl Killer Pro Micro 2.0
The Swirl Killer Pro Micro 2.0 is much more specialized in its use, but it is a game changer. This very small battery-operated machine polisher uses 2” pads and has multiple configurations. The polisher head swaps from 3mm and 12mm random orbital throws, to a direct rotary head, and even a brush attachment for scrubbing carpet and upholstery. We recommend using the 12mm attachment head for most correcting work. This polisher is intended for spot correction in small and very tight spaces, such as door handles, painted trim pieces, wheels, grilles and emblems, and other intricate areas. One other application where it is a standout performer is for polishing various areas on motorcycles. The kit comes with two rechargeable batteries with up to 1 hour of run time per battery depending on speed setting, the charger, and a carrying case. The SK Pro Micro also has an optional Rotary Polishing Attachment Kit that uses an even smaller Dremel-like hand tool with an assortment of very small polishing cones and pads down to 1/2-inch in size, to polish in between emblem lettering, behind door handles, grille sections, and other areas that are not accessible with other machines.
Swirl Killer 9mm
The Swirl Killer 9mm is our most affordable, entry-level machine polisher. It has a shorter throw orbit of 9mm, but with a very powerful 1000 watt motor. This polisher has less bells and whistles than our other machines so that it can be a less expensive option for someone buying a polisher for the first time, but it is still a more than capable machine. It uses the same 5.5” pads as our 15mm machines, but it lacks the slow-start feature and does have more vibration into your hands and arms.
Polisher Comparison Chart
| Features and Specifications | Swirl Killer 9mm | Swirl Killer 15mm | Swirl Killer Pro 15mm | Swirl Killer 12mm | Swirl Killer Pro 12mm | Swirl Killer Pro Micro 2.0 | Swirl Killer 21mm |
|
Machine Type |
Entry Level |
Intermediate |
Experienced |
Intermediate |
Experienced |
Experienced |
Intermediate |
|
Power (Wattage) |
1000 Watt, 120V |
500 Watt, 120V |
1000 Watt, 120V |
500 Watt, 120V |
550 Watt, 120V |
12 V, 2.3 Ah |
500 Watt, 120V |
|
Dual Action |
Yes, Random Orbital |
Yes, Random Orbital |
Yes, Random Orbital |
Yes, Random Orbital |
Yes, Random Orbital |
Yes, Random Orbital & Rotary |
Yes, Random Orbital |
|
Orbit Throw Length (mm) |
9mm |
15mm |
15mm |
12mm |
12mm |
3mm or 12mm |
21mm |
|
Backing Plate Size & Pad Size |
5" Velcro Backing 5.5" Pad |
5" Velcro Backing 5.5" Pad |
5" Velcro Backing 5.5" Pad |
3" Velcro Backing 3.5" Pad |
3" Velcro Backing 3.5" Pad |
1.5" Velcro Backing 2" Pad |
6" Velcro Backing 6.5" Pad |
|
Slow Start Feature |
No |
Yes |
Yes |
Yes |
Yes |
Yes |
Yes |
|
Switch Type, Location |
On/Off Rocker, Top |
Locking Trigger, Hand Grip |
Progressive Locking Trigger, Hand Grip |
On/Off Rocker, Side |
On/Off Rocker, Top |
Locking Trigger, Hand Grip |
Locking Trigger, Hand Grip |
|
Variable Speed, Location |
Yes, Dial On Back |
Yes, Dial Near Trigger |
Yes, Dial Near Trigger |
Yes, Dial On Back |
Yes, Dial On Back |
Yes, Dial Near Trigger |
Yes, Dial Near Trigger |
|
Oscillations Per Minute |
2,500 - 6,500 OPM |
2,000 - 4,500 OPM |
1,000 - 5,000 OPM |
2,500 - 5,500 OPM |
2,000 - 6,000 OPM |
2,000 - 6,000 OPM |
2,000 - 4,500 OPM |
|
Vibration Level |
Medium |
Low |
Lowest |
Low |
Lowest |
Lowest |
Medium |
|
Detachable Cord, |
No, 16 Ft. |
No, 25 Ft. |
Yes, 25 Ft. |
No, 25 Ft. |
Yes, 25 Ft. |
N/A |
No, 25 Ft. |
|
Integrated Light |
No |
No |
Yes |
No |
No |
Battery Indicator |
No |
|
Weight |
5.81 lbs |
5.75 lbs |
5.5 lbs |
4.1 lbs |
4.19 lbs |
4.5 lbs (Kit) |
6.25 lbs |
|
Cost MSRP |
$129.99 |
$189.99 |
$299.99 |
$129.99 |
$199.99 |
$249.99 |
$249.99 |
|
Color |
Red |
Black |
Red |
Black |
Red |
Red |
Black |
Compounds & Polish
Machine polishers are just one part of the equation of paint correction - a machine does no good if you don’t have the proper compound, polish, pads, and technique to go with it. Over the last few years, we’ve streamlined our compounding and polishing system to be as simple and effective as possible for most finishes. We reduced our old 3-Step System down to a 2-Step System, Compound and Polish - still both color-coded to our machine pads. We also introduced One Step Polish, which speeds up the process even further but lacks the heavier correction strength of Compound. Lastly, we introduced Sprayable Compound as an alternative, or optional enhancement, for the compounding stage. We’ll cover all four below, starting with the two most commonly used - Compound and Polish.
Compound
Compound should be used primarily as a first step compound to remove heavy oxidation and swirls. Adam’s Compound is VOC-compliant and body shop safe. This product can be used on clear coat, single stage, and lacquer paints. It is designed for use primarily with our Microfiber Cutting Pad and Blue Foam Compound Pad. With the Microfiber Cutting Pad, it can and will leave a slight haze behind as it removes heavier defects, so at a minimum, it should be followed up with a White Foam Pad and Polish in these instances. With the Blue Foam Pad, Compound can sometimes finish down nice enough to use as a one-step correction, but this will be dependent on vehicle color and softness of the clear coat.
Polish
Polish removes mild staining, mild imperfections in the clear coat, faint swirl marks, buffer halos, and micro-marring from compounding or claying. It is a silicone-free, body shop safe formula. Our Polish would be the first chemical to try in your test area, since it is our least aggressive paint correction option. In some cases, Polish might be all you need to get the surface back to as near-perfect as possible, such as a brand new vehicle off of the showroom floor, or a vehicle that has previously been ceramic coated that you just want to freshen up.
This white Polish should be the first chemical you use in your “test area”, unless the vehicle is very neglected with heavy swirl marks throughout. We’ll discuss your test area and the “least aggressive method approach” later in this article. Work it at a higher speed, typically at speed 4-5, with little to no pressure for near-perfect results, with zero dust. Our Polish is color-coded as well, and should be used with our White Foam Polishing Pads for most situations. If working on a very fragile clear coat with a darker base coat color, you can use our Red Foam Waxing Pad - this is the softest pad that we offer with zero cut to the foam structure.
Sprayable Compound
Sprayable Compound is a heavy correcting compound designed to save you time and money during your polishing steps. It’s a body-shop safe, user-friendly formula that allows you to both prime your pad and reapply compound as you correct your vehicle. By spraying the product into the pad, you’re able to use less, instead of over applying product to your pads. With Sprayable Compound, there is less chance of caking up your foam pads or clogging up fibers of your microfiber cutting pads, keeping your compound working more effectively for longer. This product can be used on clear coat, single stage, and lacquer paints; however, it is recommended for use with a softer pad and slow speed at first, to see how quickly your finish is corrected. Sprayable Compound begins as a heavy cut, but finely polishes down to remove fine swirl marks, and oxidation without micro-marring your finish. If heavy correction is needed, use a heavier duty pad, or more dense foam. The more aggressive the pad, the quicker the painted surface will heat up, ultimately providing a faster correction.
One Step Polish
Adam’s One Step Polish is an all-in-one polishing product that cuts oxidation, finishes to a brilliant shine, and removes imperfections while adding depth and gloss. It is mainly designed for use with our maroon One Step Pad, but it can also be used with various other pads to achieve different levels of correction. One Step Polish is suitable for all paint types, and is a great choice for those looking to turn around cars quickly. An example would be detailing vehicles for a used car lot, where they want them done as fast and economical as possible but may not be concerned about achieving perfect results.
Pads
We keep our machine compound and polish pads options simple and easy to understand as well. We offer four different pads for paint correction, of varying strength for heavy correcting or finishing down as perfect as possible. Each pad type is color-coded to its corresponding chemical - the blue Microfiber Cutting Pad and Blue Foam Pad are both used with the blue Compound or blue Sprayable Compound, the White Foam Pad is used with the white Polish, and the purple-maroon One Step Pad is used with the purple One Step Polish. Each pad option is explained more in-depth below.
Microfiber Cutting Pads (Blue/White)
Our blue and white microfiber cutting pad is the ideal solution in compounding pads. Adam's Microfiber Cutting Pad and Compound are the best combination to remove heavy swirl marks caused by neglect and improper care of a vehicle’s finish. The thinner foam and white microfiber material cut more efficiently with better results, especially on harder clear coats or more severe defects. After using this microfiber cutting pad, the surface can have a tendency to have a haze from the correction; this is normal, as it removes heavier defects and you will then eliminate this haze with your second step polishing phase. These pads are available in 2”, 3.5”, 5.5”, and 6.5” for our various machine polishers.
Foam Compound Pads (Blue)
Adam’s Blue Foam Compound Pad combines a thick, closed cell foam surface with a tapered, flat-face for smooth operation and easier control over curves and contours than the Microfiber Cutting Pad. The blue compounding face balances strong cutting power with nice finishing ability, making this our most versatile cutting and compounding pad. On some paint types and clear coats, this pad can sometimes finish down nice enough that you may not have to use our White Foam Pad and white Polish afterward. The Blue Foam Pad is available in 2”, 3.5”, 5.5”, and 6.5” sizes.
Foam Polish Pads (White)
Adam’s White Foam Polishing Pad is a soft, closed cell pad designed to maximize gloss, shine, and depth in your finish. Made with a unique pre-polymer closed cell foam, the white polishing face balances soft finishing capability with increased gloss ability, making this polishing pad the perfect choice to combine with our white Polish for your last in the paint correction process. Refining the finish down to as perfect as possible is the goal before you would then apply a wax, sealant, or ceramic coating. Like our other pads, the White Foam Pad is available in 2”, 3.5”, 5.5”, and 6.5” diameters.
One Step Pads (Maroon)
Our One Step Pad is a hybrid design of blended microfiber and wool material, bonded to a dense foam interface pad for both cutting and finishing. Color-coded to our purple One Step Polish, this pad is a nice balance between correction and finishing. On most vehicles, you will see significant improvements in swirl mark and defect removal when using this pad with One Step Polish; however, this combination typically will not produce results as good as the stronger blue Compound. Like our other pads, the One Step Pad is safe on single stage, clear coat, and gel coat finishes. For softer paints, you may need to follow with a less dense pad, such as our White Foam Pad, as the One Step Pad pad may have a tendency to micro-mar gentle paints with a soft clear coat.
One bonus use with this pad is to use it with our blue Compound or blue Sprayable Compound. Because of its hybrid design, the wool material of this pad allows it to heat up more quickly. When combined with a compound, this pad can do even more correction than our Microfiber Cutting Pad! You will need to monitor temperature more frequently, as you could potentially cause damage with this most aggressive combination of our pads and chemicals. This pad is currently available in 3.5”, 5.5”, and 6.5” sizes.
The 4 P's Of Paint Correction
Now that we have gone over machine choice, chemicals, and pads, it’s time to take all of that information and apply it to a vehicle and fix some paint! After decontaminating the vehicle with a clay bar, clay mitt, or clay decon pad, the first step to paint correction is identifying a suitable test area on the vehicle. Visually inspect the condition of the paint first by either moving the vehicle out into the sunlight or looking at it with excellent lighting like our color-match LED lights, to highlight imperfections.
You want to choose a small area of the vehicle that is representative of the overall condition of the paint, such as a section of the hood, a fender, or the top of the trunk lid. It is very important to figure out the correct combination of pads and chemicals needed to fix this test area properly - you do not want to machine polish the entire vehicle only to move it outside into the sunlight and see that you did not use a strong enough combination and have to re-do all of your work. When referring to paint correction, we often mention the “Four P’s” of polishing in many of our videos and clinics. These are Pressure, Plane, Pad, and Pace, and all four are critical to achieving proper results.
Pressure
When using a machine polisher, you want to use some downward pressure onto the surface, but not too much pressure. You should hear the pitch of the motor and the machine spinning change ever so slightly. You do not want to press down so hard that you cause the oscillating motions to stop or stall - the pad needs to keep rotating and moving in order to fix the surface properly.
Plane
Working in an appropriate size of plane, or surface area, will also determine how well you improve the finish. If you work in too large of an area at once, the Compound or Polish may be stretched too far and not be as effective. Working in too small of an area with too much chemical will increase time and clog up your pads more quickly. Work in areas around 1-foot by 1-foot to 2-foot by 2-foot in size for compounding. This usually means breaking a door panel up into 4 areas, or a hood into 6 or more sections, for example.
You can usually work in larger areas at a time for the polishing stage, since you are refining the plane at this point. Work in cross-hatch patterns, in a left-right motion and then in an up-down pattern to ensure that you cover the plane from multiple angles. This would be considered one “pass,” and you will usually perform 2 or 3 passes per area.
Pad
Keeping the machine backing plate and pad flat to the plane is a necessary part of polishing technique with random orbital polishers. Your pad must remain as flat as possible to the area that you are working on. This is also where pressure plays a role. Too much pressure forward, backward, or to one side can cause the pad to have less contact in one spot than the rest of the pad, and also cause the oscillations to stall. You should not do old-school rotary buffer techniques of holding the pad at a 45-degree angle to the working plane - this will damage pads quickly, since the oscillating motions will force the side of the pad into the surface, which can chew up the foam quickly or tear the pad away from the Velcro backing.
When moving the pad across the surface, make sure that each pass has 25-50% overlap so that you have very even coverage. On complex curves and rounded areas, try to move the pad with the curvature of the panel to keep it as flat as you can; however in some instances, you will find that you may need to lift the pad slightly in some spots to prevent stalling and to keep the pad rotating and oscillating as it should.
Pace
Pace is the fourth and final “P” of machine polishing technique. By pace, we mean the arm speed that you move the polisher across the surface. Moving the machine too quickly across a panel, especially during the compounding stage, will not produce good results. The compound and polish need some time to work into the surface, to allow the micro-abrasives to break down how they are designed to work. You want to think of it almost like a slow-motion movement, moving the polisher about 1” per second. You should see the residue on the panel have a very tight overlapping pattern that looks similar to welding beads.
Just as important as pace, or arm speed, is machine speed. Many might be hesitant to run the polisher at a higher speed and will run it at too slow of a speed for compounding, for example speed 1 or 2, and achieve little or no improvement. Speed setting 5 is generally a good all-around speed to run the machine at for compounding. For the secondary polishing stage, you can usually run the machine a little slower, at speed 4, but each finish will be somewhat different - one car may finish down perfectly at speed 4, where another car may require speed 6 with zero downward pressure. The more you practice, the more you will find what works best for you.
Even one incorrect choice in machine, chemical, or the four P’s of machine polishing can significantly decrease paint correction results. Spending more time on the initial compounding stage to achieve a great finish makes the polishing stage easier and will give you better results. The compounding stage is a lot of work, physically and mentally, and you will not be an expert on your first vehicle, so don’t get frustrated. Adam always says “never polish angry.” The polishing (finishing) stage should be more relaxed and easier for most vehicles, and once you get the hang of things, paint correction can become a very fun and rewarding experience - seeing a vehicle go from good to excellent is a very rewarding feeling! We’ll give a quick order of operations for performing a multiple step machine paint correction or a one-step machine polishing below, but for more in-depth instruction on the process itself, make sure to watch our Paint Correction video here.
Multi-Stage Compound and Polish
1. Thoroughly Wash Vehicle - Two Bucket Method (Strip Wash, Car Shampoo, or Mega Foam)
2. Chemical Decontamination - Adam’s Iron Remover (Optional)
3. Rinse (and Dry - Optional)
4. Clay and wipe away majority of residue
5.Test area - Determining pad and compound combination
6. Compounding Stage - Speed 5, overlapping Passes
7. Polishing Stage - Speed 4, finishing to near flawless
8. Wipe down surface with Surface Prep
9. Wax, seal, or ceramic coat painted surfaces
One-Step Polish
1. Thoroughly Wash Vehicle - Two Bucket Method (Strip Wash, Car Shampoo, or Mega Foam)
2. Chemical Decontamination - Adam’s Iron Remover (Optional)
3. Rinse (and Dry - Optional)
4. Clay and wipe away majority of residue
5. Machine polish with One Step Polish and One Step Pad
6. Wipe down surface with Surface Prep
7. Wax, seal or ceramic coat painted surfaces
Extra Tips
Paint Types - Clear Coat, Single Stage, and More
There are several different types of paint finishes, depending on the age of the vehicle. Nearly all modern vehicles have a multi-layer paint finish, usually referred to as base coat-clear coat. This type of paint finish starts with a primer layer on top of the substrate, meaning the type of material of the body panel - whether it is steel, aluminum, fiberglass, plastic, carbon fiber, and so on. Then the base coat (color) layer comes next, and then finally the clear coat layer for shine and UV protection. All of our pad types and chemicals are safe for use on base coat-clear coat finishes.
Next up is single stage paint, where you have a primer layer and color layer only, with no top clear coat. This means that every time you polish a single stage paint job, you will be pulling up some color into your pad. These paint jobs are more common on older vehicles, but even some manufacturers used single stage paint into the 1980’s and 1990’s. Single stage paint can also be referred to as lacquer or enamel, since these are the types of paint that are used for single stage paint. Lacquer was common in the 1950’s to 1970’s, whereas most paints now are water-based enamels. With single stage finishes, always start with a soft pad and light polish, like our White Foam Pad and white Polish. They are easier to correct and do not usually require an aggressive compound to fix.
Some final paint types are gel coat, typically used for marine applications on boats or on campers and RV’s, and matte and satin finish paints. Gel coats on boats are usually very thick, so you can use heavier cutting pads and compound on them; however, gel coats on campers and RV’s are usually very thin, less than 1/32nd of an inch, so you will want to be more careful when polishing these. Matte paints with zero gloss and satin paints with a hint of shine are becoming more popular on some vehicles - you cannot polish these types of paint without altering the appearance, so we do not recommend it. The same goes for matte and satin vinyl wraps, you do not want to polish those finishes.
Paint Hardness
Paint (or more specifically clear coat) hardness can vary dramatically between manufacturers and even within the same make and model. If you are a detailer working on several vehicles a week or month, consider creating a log book with notes on each specific vehicle that you detail. Even when you’ve worked on many of the same vehicle type, there are exceptions - especially if panels have had bodywork and paintwork done. Be prepared to adjust your techniques during the detail if something isn’t working out how it normally does, such as grabbing a clean pad, changing your pressure or pace, or turning the machine speed up or down.
Ceramic Coating
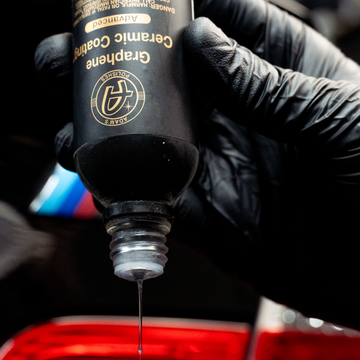
Paint correction greatly enhances the look of the vehicle, and it’s a highly recommended step in the ceramic coating process. Machine polishing the surface leaves it free of defects and completely bare, in order for our Graphene Ceramic Coating™ to bond and cure properly. Even brand new vehicles should be polished before applying Graphene Ceramic Coating™, so that you remove all contamination and have a smooth surface that looks as nice as possible before you seal in that look for several years with a coating.
Responsibility
Whether you are detailing an exotic sports car, a collector car, or a daily driver, show responsibility and treat all vehicles with respect. Know when to stop - achieving a 100% “perfect” finish is almost always not possible. If you keep focusing on a particular deep scratch over and over, that is when you can strike through the clear coat or cause other damage, such as thinning the clear so much in that area that you may strike through more easily in the future. Each time you machine polish, you are removing a very small amount of clear coat, about 1/32nd of an index card in thickness, so you do want to consider how often you paint correct a vehicle if you plan to keep it 5 or 10 years down the road or as it moves onto the next owner. The rule of thumb is to use the least aggressive method necessary to get the job done, so that is why it is very important to have a test area that we discussed earlier in this write-up.
Summary
In this blog, we explained what we mean by paint correction - the process of machine polishing to remove defects like swirl marks, oxidation, and light scratches to bring out the best gloss and depth in a vehicle’s painted surfaces. We provided an overview of machine types, explained the difference between Compound and Polish, and covered the different types of pads and what stage they are used in the machine polishing process. We outlined the “Four P’s of Paint Correction” and how to apply them to your polishing technique, and then we went over the process steps, and some extra tips. We hope this write-up makes you much more comfortable and excited to try out machine polishing on your own vehicle. If you are uncertain about any product or process, or have any questions in general, feel free to contact us at tips@adamspolishes.com, or reach us on our online communities on Adamsforums.com, Instagram and Facebook, as well.


