When it comes to washing a car, you may think this a fairly basic task or you might be intimated if this is your first new car. Either way, improper washing and incorrect drying methods are the two main causes of swirl marks, scratches, and other imperfections in a vehicle’s paint finish. In this quick blog, we’ll outline proven steps to safely wash a car to keep things effective and easy for beginners.
How To Wash A Car For Beginners
Introduction
Step 1: Gather Supplies
Before you jump into washing your car, you should gather and prepare everything you will need for the wash. Spending a little extra time organizing your supplies first will save you time throughout the washing and drying process, and you will achieve better results since you will not be running around grabbing brushes, wash mitts, drying towels, and more while letting strong wheel cleaners or hard water stand on the various surfaces.
The amount of supplies you will need will depend on how thorough you want to be with the wash, but for this article, we’ll keep it as easy as possible with the key basics that you should have for a proper wash. You will need:
-
Two Buckets with Grit Guards (Soap & Rinse 2 Bucket Combo)
-
Hose and Hose Nozzle
-
Wheel & Tire Cleaner and Brushes (Adam’s OEM & Stock Wheel Cleaning Basic Kit)
-
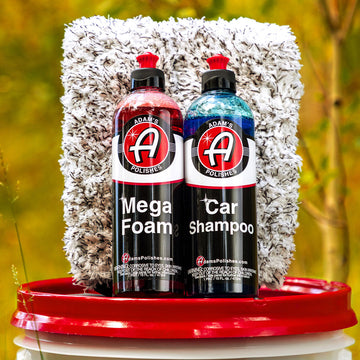
Car Wash Soap (Adam’s Car Shampoo)
-
Premium Wash Mitt, Wash Pad, or Wash Sponge
-
Microfiber Drying Towel (Adam’s Ultra Plush Drying Towel)
It's important to use a vehicle-specific pH-neutral soap when washing. Household soaps can dry out rubber seals and trim, and strip wax and sealants from paint, which can then cause water spots to form more easily.
Step 2: Clean Wheels And Tires First
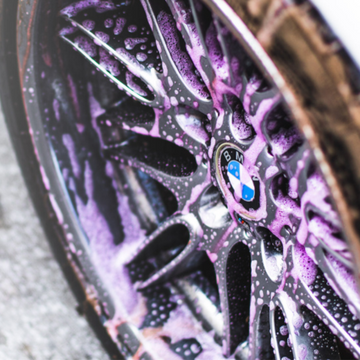
Before you put any water to the vehicle to start rinsing panels, start the car washing process by cleaning the wheels and tires first. We recommend cleaning the wheels and tires first because they are usually the dirtiest part of the car, and also so that you do not have standing hard water on the body panels if you were to wash them last, which could create water spots. Make sure the wheels and tires are cool to the touch - if you were just out driving the vehicle around, consider cleaning the interior first while the wheels, tires, and brakes cool down. Only clean one wheel and tire at a time. Do not attempt to clean multiple wheels at once, since the cleaner could sit on the wheel face too long and possibly cause staining or damage.
Move the car into the shade if possible. Rinse the wheel with the hose, then generously spray Wheel & Tire Cleaner onto the tire, wheel face, and inner barrel of the wheel. If the fender liners are plastic, spray the Wheel & Tire Cleaner onto them and scrub them with the Rubberized Tire Brush - if they are carpeted fender liners, rinse them with the hose and scrub them with the Tire Brush without any chemical.
Use the Small Angled Wheel Brush to clean the inner barrel of the wheel, then the Rubberized Wheel Brush to clean the spokes and outer rim, and then use the Rubberized Tire Brush to scrub any previous tire dressings and brown discoloration from the sidewall of the tire. Then very thoroughly rinse all dirt and chemicals from the fender well, tire, and wheel, starting from the top of the fender well and then working downward. Clean and rinse out all three brushes, then repeat this process for the remaining 3 wheels and tires. Adam walks you through the process in this video here: How To Clean Stock & OEM Wheels Easily And Effectively
Step 3: Rinse The Car
It’s now time to wash the car itself. Prep your Rinse and Soap Buckets first. Fill the Rinse Bucket with about 3.5 gallons of clean water, with the Grit Guard properly inserted into the bottom of the bucket. Fill the Soap Bucket with about 2 gallons of water, then pour 1-2oz of Car Shampoo directly onto the Wash Pad or Wash Mitt and place it into the bucket. Then use the hose to spray more water into the bucket and activate a thick sudsy soap solution.
Begin with rinsing heavy dirt and debris using the hose - rinse areas in the shade first, then areas in direct sun last, in order to minimize the chance of water spots. Also make sure to rinse using a “top-down approach.” This will ensure that dirt and debris constantly moves downward onto the vehicle and does not move upward onto an already rinsed section or panel. You want to do this rinsing step fairly quickly, especially if you are working on a hot or sunny day.
Step 4: Wash The Car
Next, wash the car with the sudsy Wash Pad from the top down. Wash areas in direct sunlight first, so that they have soap on them to prevent water spots, then move onto the shaded areas. Scrub your Wash Pad out often on the Grit Guard in the Rinse Bucket to remove dirt and debris, then reload it with more suds from the Soap Bucket and move onto the next panel. Wipe the panels in lines rather than circles to avoid creating wash-induced swirl marks. Leave the soap residue on the panel after washing it - do not rinse after washing each panel. It is better to leave the pH-neutral soap residue on the car throughout the wash. Adam’s Car Shampoo will rinse cleanly even if it begins to dry on the surface, so it is better to leave it on the surface until the end of the wash in order to prevent water spots from developing. Do not scrub with heavy force especially on things like bug guts and bird droppings, as these can then scratch or scuff the surface. We will cover heavy bug guts in Step 7 below. Here is a quick overview video of washing your car: How To Wash Your Car Without Scratching
Step 5: Rinse The Car Again
After washing the entire car, rinse it again with the hose, starting from the top down. Rinse the areas in the shade first, then move onto rinsing the sunny areas last. Again this will help to keep the amount of time that hard water is sitting on the surface to be as short as possible to reduce the chance of water spots. Ensure that you have rinsed all areas of the vehicle, especially areas that can trap soap residue such as door handles, grilles, mirrors, cooling vents, and so on.
Step 6: Dry The Car
Quickly after rinsing the car, begin to dry it using a clean premium microfiber drying towel such as the Adam’s Ultra Plush Drying Towel. You can use a drying aid such as Adam’s Detail Spray to help reduce water spots while drying. Lightly mist Detail Spray around the entire exterior of the vehicle. Fold the large Ultra Plush Drying Towel in half, and then carefully drape it over the windshield and pull it towards you to absorb all of the water and soften up the dry towel in the process. Then move onto the roof, rear window, hood, and trunk area in this same manner. Dry all sunny areas first, and shaded areas last. Then move onto fenders and doors, then bumpers last. Make sure not to drag the towel on the ground when you get to lower areas of the vehicle. If any water spots do develop, mist a little more Detail Spray in that area and dry it again.
Step 7: Finish With Detailing
The vehicle is now dry, but we should finish things off to make it look great. Use Adam’s Tire Shine with a Pro Tire Hex Grip Applicator to dress the sidewalls of the tires, making sure not to apply too much. Use the applicator to evenly spread the Tire Shine into all tread grooves and lettering, so that it does not sling or splatter later. Use Detail Spray and the Ultra Plush Drying Towel to take care of any drips out of mirrors, door handles, lights, and so on. Lastly, if there are heavy bug guts on the bumpers or tar on the rocker panels, use Detail Spray as a lubricant for the Visco Clay Bar. Spray the Detail Spray onto the affected area, then carefully glide the clay back and forth to pull this bonded contamination from the surface. Then wipe away the residue with your towel. For a how-to on clay decontamination, reference the video here: How To Properly Decontaminate A Vehicle With Clay
Summary
You’re now ready to sit back and admire your clean car, or take it out for a drive and be proud that you have now safely washed your car. Proper washing is the foundation to moving onto more involved detailing tasks if you are a beginner or new to detailing or vehicle ownership. If you don’t have your washing technique down, you can end up causing more damage to the finish by using improper products and accessories. Washing a car may seem a little stressful at first, but by following the steps outlined in this blog, you will ensure that your car is cleaned safely and properly without causing damage to the paint, wheels, and other exterior areas. As you practice with more and more washes and get your car washing gear set up and organized better, With practice, car washing will become more and more efficient, easy, fun, and rewarding. If you are uncertain about any product or process, or have any questions in general, feel free to contact us at tips@adamspolishes.com, or reach us on our online communities on Adamsforums.com, Instagram, and facebook, as well.
