Safely washing your vehicle during harsh winter months can be challenging. In areas with large amounts of snow and ice, your vehicle is exposed to salt, magnesium chloride, ash, and other road treatment materials. While these materials make for safer driving conditions, they also put heavy wear and tear on paint, chrome, and wheels, along with the frame, suspension, and exhaust components. This dirt and contamination can lead to corrosion, oxidation, etching, staining, and rust if ignored until Spring. These road treatment methods also impair visibility out of the windshield, side windows, and back glass.
In this blog, we’ll go over methods and recommendations to make winter washing less challenging, in order to keep your vehicle looking its best during the winter months. We’ll cover a few different washing methods to safely clean your vehicle, to provide for a safer driving experience, and ensure that your ride is well-maintained and protected for years to come.
Winter Washing In
Different Climates
Introduction
Winter Washing - Prep
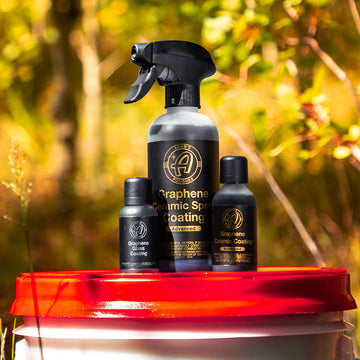
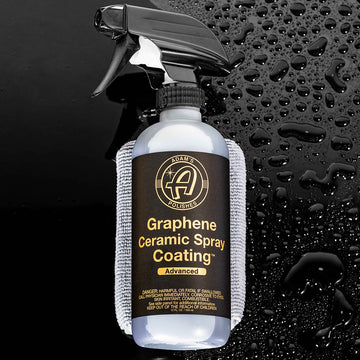
Before we explain the various methods of washing your vehicle during the winter, the first step to make washing easier is proper prep and protection of all exterior surfaces. Protecting exterior surfaces like paint, glass, chrome, wheels, and fender wells with Graphene Ceramic Spray Coating™ helps to reduce the chance of damage, and makes winter sludge and debris wash off more easily. We detailed the entire winter prep process in a recent video and write-up. Make sure to reference the video below or review that write-up here: Winter Preparation & Protection
WINTER WASHING - TOUCHLESS COIN-OP CAR WASH
Cold winter temperatures combined with snow do not make for a very easy or fun wash experience outside at home. Hoses can freeze, which can then cause pipes to crack or burst. Driveways can turn into sheets of ice while washing, and soap and water can freeze onto the vehicle. Some may be fortunate enough to have a heated garage with drains for indoor washing, but the reality for most of us is that we do not have that option, and many may not have a garage at all.
First and foremost, a good rule of thumb is to wait until there is a slightly warmer day, where the temperature is above 30℉, to wash your vehicle. This way you will avoid having water freeze onto the vehicle and potentially freeze shut door handles, locks, and doors, preventing you from getting back into the vehicle. Going to a touchless coin-op, or self-serve, car wash is a fast and cost-effective way to clean your vehicle, or clean the majority of it if it is heavily dirty, to then perform a Hoseless Wash or Waterless Wash at home in the garage, which we explain below. Touchless self-serve car washes usually use warmer water, along with weeping systems that will slowly drip water out of the high pressure sprayers, to avoid freezing issues. Some touchless washes even have heating elements in the concrete to prevent the bay floors from freezing.
IMPORTANT: You want to be very careful not to use very hot water on a very cold car, as the large temperature difference may cause windows and windshields to crack!
Item Checklist:
- 5-Gallon Bucket with Grit Guard and Gamma Seal (Wash)
- 3.5-Gallon Bucket with Grit Guard (Wheels)
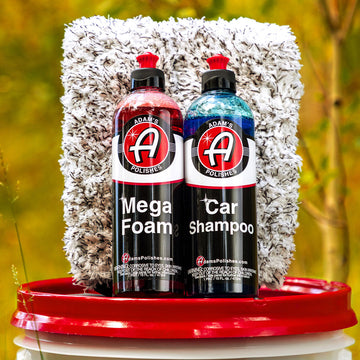
- Car Shampoo 16oz (or your favorite soap)
- (2) 10” Wash Pad
- Wheel & Tire Cleaner in 32oz Dilution Bottle
- Angled Wheel Brush
- Rubberized Wheel Brush
- Fender Brush
- Ultra Plush Drying Towel
- Graphene CS3 16oz
- Borderless Grey Towels (2)
- Graphene Tire Dressing
- Pro Tire Hex Grip Applicator
To save time at the Coin-Op Touchless Car Wash, it’s best to prepare as many things as you can at your home or apartment before heading out on the road. Fill your 5-Gallon Bucket with about 3-3.5 gallons of warm water, put the 2 wash pads into the water, then spin on the waterproof Gamma Seal Lid and place it into the trunk or cargo area of your vehicle. Pre-fill a 32oz Dilution Bottle with Wheel & Tire Cleaner and place it into the 3.5 Gallon Bucket, along with the other wheel and fender brushes. Place the other 16oz bottles into the 3.5 gallon bucket as well. Put any applicators, and towels into a trunk organizer or detailing bag and then into the vehicle.
Washing your vehicle at the Touchless Car Wash is similar to your everyday wash but with an altered process. During winter, the temperatures are lower which means water won’t dry as fast on the surface of your vehicle slowing the process of water spotting. Now, to reduce the usage of the pressure washer wand and consolidate the rinsing of your vehicle you will first get your bucket with wash pads out, place Car Shampoo onto the wash pads and inside the bucket. You want to utilize the soap on the wash pads maximizing the amount of lubricity while washing. Now, insert coins or swipe your credit/debit card to initiate that pressure wand. Make sure you are on the “high pressure rinse” setting, not the spot free rinse. You want the maximum amount of pressure out of the wand for your initial rinse. Rinse your entire vehicle. Focus on the dirtiest parts of the car (bottom half, front of car, rear of car, etc.). Once you have done your initial rinse, activate the suds in your bucket by blasting the pressure washer wand onto the wash pads in your bucket. This will generate thick suds in your bucket and in/on your wash pad. Put the pressure washer wand away and press stop on the wash bay controls. Now it’s time to wash your car. Grab one wash pad and begin washing, starting with the parts of the car that are exposed to the sun. The reason for this is to neutralize the water that will most likely dry first on the car. Adam’s Polishes Car Shampoo and all of Adam’s Car Soaps neutralize hard water encapsulating the minerals in the water eliminating the chance for water spotting. It is more safe to have Adam’s Car Soaps dry on your vehicle than it is to have hard water dry on your car. So wash the parts of your car in the sun first then wash the rest of the vehicle. Make sure to consistently flip your wash pad and rub it against the Grit Guard in the bucket. This will ensure you are not dragging or wiping with heavy sediment in your wash pad. Use one wash pad for one side of the car and the other wash pad for the other side of the car. Another tip is to wash from the top down. The bottom of your vehicle is the most dirty.
After you have washed your vehicle with the Car Shampoo and Wash Pads it is time to move onto the wheels and tires. Keep your bucket with water and soap but swap out your wash pads for your wheel cleaning tools. Using Adam’s Wheel & Tire Cleaner, spray down the face of the wheels, barrel of the wheels, tires and fender wells. Using your assortment of wheel cleaning tools, thoroughly clean your wheels, tires and fender wells. Clean all four wheels, tires and fender wells, then it’s time to rinse the entirety of the vehicle.
For and in depth, comprehensive “How To” video of How To Wash Your Car At A Self Serve Car Wash, watch the video below:
WINTER WASHING - HOSELESS WASH PROCESS
Hoseless washing may seem like a strange technique to some, but it is a very safe and effective way to remove light dirt from your vehicle if you are unable to use a hose or pressure washer. This is especially true during cold winter months, but this wash technique can be used year-round for those that may have neighborhood, apartment, or condo restrictions against washing with a hose. The Hoseless Wash process uses a 5-gallon bucket filled with about 4 gallons of warm water, 6 or more clean plush microfiber towels like our Double Soft Towel, and our Hoseless Wash concentrated wash solution mixed into the water in the bucket. Next we'll explain how to perform this process and how it works.
Item Checklist:
- 5-Gallon Bucket filled with 4 gallons of warm water
- 32oz Dilution Bottle
- Empty 3.5-Gallon Bucket (Optional)
- Double Soft Towel (6-Pack)
- Hoseless Wash 16oz
- CS3 and Single Soft Towels (Optional)
Begin the Hoseless Wash process by using your fingers to pull away any heavy debris like leaves, tree needles, etc from the surface of the vehicle, especially around the wiper cowl, since you do not want to pick up any of these materials into your towels. If there is heavy mud, dirt, magnesium chloride, or salt buildup on the vehicle, you need to remove that before doing the Hoseless Wash. You can do this by finding a coin-op touchless car wash close to your home or apartment complex, and using their pressure washing with water only to blast away heavy contamination from fender wells, wheels, bumpers, lower doors, and rocker panels, then switch immediately to their spot-free rinse and quickly rinse the vehicle. The vehicle will not be completely clean at this point, but in this manner, you’re spending minimal time and money at the coin-op touchless wash, to then head back home to finish fully cleaning the vehicle.
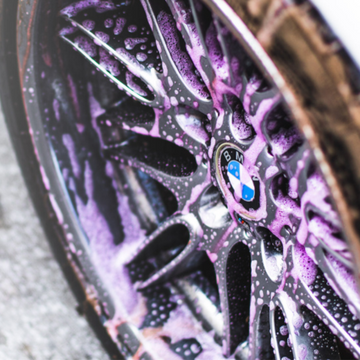
First, dilute the Hoseless Wash into a 32oz Dilution Bottle to make a Waterless Wash spray to pre-treat heavier dirt areas. You can use 1-2oz of Hoseless Wash to 30oz of water in the Dilution Bottle, then shake the bottle to mix it evenly. Spray these areas and let the solution soak. Next, prep your bucket by filling it with about 4 gallons of warm water, then pour 2 ounces of Hoseless Wash directly into the water. You can measure this out as approximately 1” of chemical out of the 16oz bottle. Next, take 3 or 4 Double Soft Towels and fully dunk and submerge them into the solution. Stir the towels around with your hand to mix the Hoseless Wash solution evenly, turning all of the water to an even, transparent or cloudy purple color. Lift one towel out of the solution and squeeze out excess solution back into the bucket, so that there is minimal dripping. Fold the towel in half and then into fourths. Once you have removed a towel from the solution bucket, do not place it back into this bucket for the remainder of the wash process.
Just like the Two-Bucket Wash Method, we’ll clean in a top-down approach. Start at one edge of the roof, and carefully wipe the towel across the surface in one direction, slightly rolling the towel with your wrist as it is passing over the panel. This allows the dirt to more evenly distribute across that “side” of the towel. Perform one or two more passes with this side of the towel, until it appears heavily soiled, then carefully flip the towel over and repeat this process with another side. Once the roof has been fully wiped, take one of your clean, dry Double Soft Towels and wipe away the remaining residue on the roof, leaving the roof surface clean, dry, and finished.
Move onto all of the glass next, and continue wiping each panel with a wet solution towel and then finishing with the dry Double Soft Towel. Each wet towel will give 8 working “sides”, so approximately 8-24 passes across different panels, depending on the condition of the vehicle. Once all 8 sides of a towel are dirty, set it aside - place the towel onto a Grit Guard outside of the bucket or into an empty 3.5-Gallon bucket, so that it does not contaminate the Hoseless Wash solution bucket, then grab another fresh wet solution towel. Clean the rocker panels, door and trunk jambs, inside gas cap, and wheels last since they will be the most dirty areas. With the vehicle now clean, you can then re-up the protection on the vehicle with CS3 while taking care of any remaining streaking at the same time. Soak all of the dirty towels in a bucket of water with 1oz of our Towel & Pad Revitalizer to remove heavier debris before putting them in the washing machine to thoroughly clean them.
For an even more thorough and safe Hoseless Wash technique, you can introduce our Foam + Wash into the process. Foam + Wash with a pressurized foaming sprayer like the iK Foam Pro 2 Sprayer to distribute a thick foam solution onto a panel to further increase lubricity and cleaning power, before you wipe the panel with your Double Soft Towel saturated in the Hoseless Wash solution. You can view an in-depth demonstration video of this process here:
BONUS TOPIC - INTERIOR CLEANING
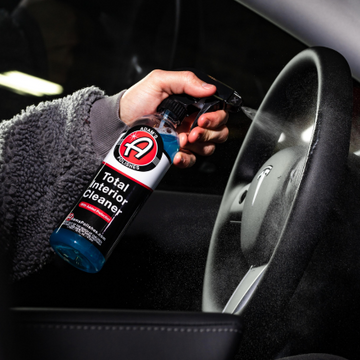
The final section of this writeup deals with an area of your vehicle that can see very heavy dirt, mud, and snow accumulation during winter - the interior! With just a few cleaning tools, towels, and one chemical though, you can easily clean up the entire interior of your vehicle well enough to make it through winter until you can do a more thorough deep clean and conditioning of various interior surfaces when it warms up in the spring. Adam’s Total Interior Cleaner is a multi-surface spray that cleans and offers protection in an all-in-one, easy formula. It finishes down with a factory-new look with zero shine, to leave surfaces smooth and fresh, and not slippery, greasy, or oily.
Item Checklist:
- 5-Gallon Bucket with warm water
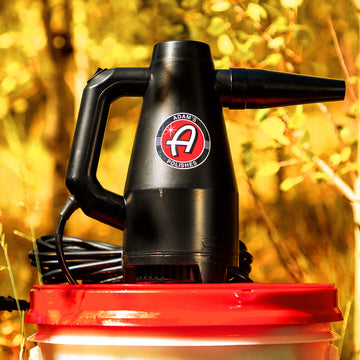
- Air Cannon
- Wet/Dry Vacuum
- Cordless Drill
- Total Interior Cleaner 16oz
- Carpet Drill Brush
- Edgeless Utility Towel (2-Pack)
- Green Glass Towel (2-Pack)
- Interior Scrubbing Mitt
The first thing you should do when cleaning an interior is to gather up all loose articles and place them in a plastic bag. This way you don’t end up vacuuming up something you don’t want to lose. Then remove any rubber liners from cup holders and door pockets and soak them in a bucket of warm water. Remove any carpet or all-weather floor mats, then use the Air Cannon to blow out door pockets, air vents, buttons, cup holders, seat seams and underneath seats around the seat rails to loosen any stubborn debris. Then vacuum the interior from the top-down, starting with the front seats and floor to any additional seating rows to finally the back cargo/hatch/trunk area.
Clean the floor mats first, so that they have time to dry out while cleaning the remainder of the interior. Vacuum the floor mats to remove loose dirt, leaves, etc, If the floor mats are soiled or stained, attach the Carpet Drill Brush to your cordless drill, generously spray down the mat with Total Interior Cleaner, and then use the Carpet Drill Brush to thoroughly scrub the carpet or all-weather material. Total Interior Cleaner will foam up some when agitated, so use one of the Edgeless Utility Towels to wipe up any excess cleaner. Next clean the dashboard and center console with the second Edgeless Utility Towel.
Move onto the windows, gauges, and entertainment screen with Total Interior Cleaner and a Green Microfiber Glass Scrubbing Towel, then use the second Glass Towel to leave a streak-free finish on these surfaces. Then move onto the steering wheel, door panels, and seats, using Total Interior Cleaner with either the Edgeless Utility Towel or Interior Scrubbing Mitt for a deep-clean. Finish off the interior by wiping down lower interior areas like kick panels and door sill plates.
Summary
In this blog, we went through a few different options for winter washing of your vehicle, depending on weather conditions and available washing environments. We gave our recommended products to take with you for a safe and efficient process at a Self Serve Car Wash. We showed that performing a Hoseless Wash at home is fast and fairly easy - with just a few products, a bucket, and a few gallons of warm water, a Hoseless Wash usually takes less than 20 minutes to complete an average size vehicle. And finally as a bonus topic, we covered how to quickly take care of your full vehicle interior with just one chemical, Total Interior Cleaner, and a few cleaning accessories. If you are uncertain about any product or process, or have any questions in general, feel free to contact us at tips@adamspolishes.com, or reach us on our online communities on Adamsforums.com, Instagram and facebook, as well.
