
• The importance of decontaminating paint and glass before applying a ceramic coating
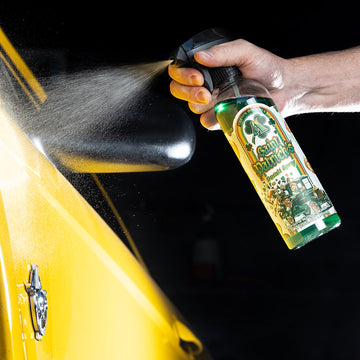
• Cleaning and restoring plastic trim with Tire & Rubber Cleaner before coating it
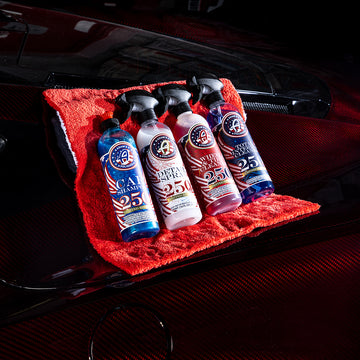
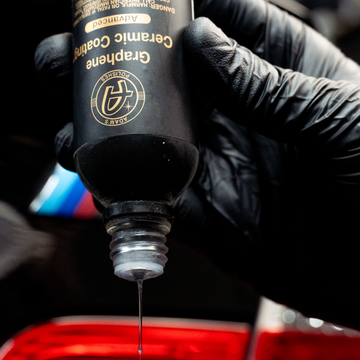
• How to apply Graphene Ceramic Spray Coating Advanced in under 1 hour
Cart
Your cart is empty
• The importance of decontaminating paint and glass before applying a ceramic coating
• Cleaning and restoring plastic trim with Tire & Rubber Cleaner before coating it
• How to apply Graphene Ceramic Spray Coating Advanced in under 1 hour
• Tips on seeing the coating "rainbow" on lighter color paints and how to fix any high spots
• How long do you wait before you remove the residue with a clean plush towel
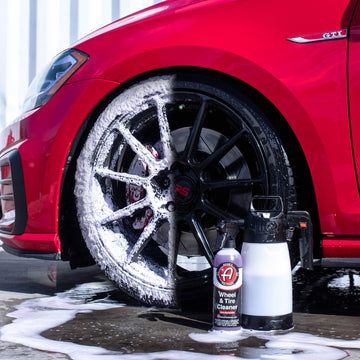
• How to quickly protect your wheels, plastic wheel wells, and tires
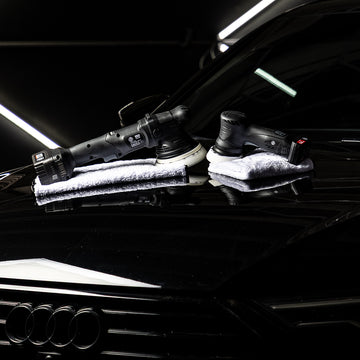
In this video, Adam shows you how to easily apply a ceramic spray coating to your vehicle in a matter of hours from start to finish, rather than a matter of days. Let's be honest, not everyone has the time, funds, or patience to do a full wash, paint decontamination, and then paint correction with a random orbital polisher, compound, polish, and the corresponding pads to get the vehicle's paint looking as close to perfect as possible. You can spend upwards of 15 to 20 hours or more doing this whole process. But as Adam mentions in the video, if you are happy with how the finish looks on your vehicle, you do not necessarily have to do a paint correction with a machine in order to apply our Graphene Ceramic Spray Coating Advanced - it's not imperative, but it is recommended for the maximum overall looks and results. This video and process is for the hobbyist that is new to ceramic coating that might be hesitant to apply a ceramic coating, and not necessarily concerned about fixing every little defect like most of us detailers want to do. Don't worry...we have separate videos and processes that are geared towards the more thorough and complete detailing processes as well, but the focus of this video is on being efficient with your time, using minimal effort, and achieving excellent results, with durable protection that should last over a year or longer.
There are two imperative but easy tasks that we recommend you must do before applying the spray coating for best results: (1) Decontamination with clay and (2) Deep-cleaning dirt and oxidation from exterior trim pieces. Washing and drying your car is a necessary first step in applying a ceramic coating because you cannot apply it to a dirty surface, but a traditional Two-Bucket Wash or a Waterless Wash is not enough to remove all of the dirt and contamination that becomes bonded into the clear coat finish of the painted panels or bug splatter, road debris, and other overspray that bonds into glass. In this video, Adam uses the Visco Clay Bar and Geo-Impression Tool hand grip with Detail Spray as the clay lubricant, but you can use a Clay Mitt during the wash process as an alternative method, by re-sudsing the vehicle with Car Shampoo or Mega Foam soap (after you have washed the vehicle), to clay the surfaces before you rinse and dry the car. If a surface feels rough or not smooth after washing, decontaminate it by spraying Detail Spray over the area, then glide the Visco Clay back and forth over the area. Do not wipe the clay in circular motions and do not use a lot of pressure, let the clay do the work for you. As you glide the clay back and forth, you will feel the surface tension reduce and the clay will glide more easily. Stretch, fold, and flatten the clay as a working "side" becomes too contaminated, then continue moving onto the other panels, and then finally clay the glass.
Using the Visco Clay Bar on the entire vehicle should take around 30 minutes or less - you don't have to be extremely thorough and meticulous with the clay process, since the main goal is to remove the overall majority of contamination in a quick manner. If you use heavy pressure without refreshing the clay to a new area by stretching and folding it, you have the chance of introducing light marring or faint scratches into the surface, so keep that in mind as you go around the vehicle - especially the heavily contaminated areas like rocker panels, bumpers, and the trunk, hatch, or tailgate. Next, you will need to clean the exterior plastic and rubber trim, such as the wiper cowl, wipers, textured side mirror plastics, step rails, and so on, very thoroughly in order for the coating to look even on these surfaces. Scrubbing these areas with an Edgeless Utility Towel with several sprays of Tire & Rubber Cleaner sprayed directly into the towel will quickly remove dirt, oxidation, and discoloration from these surfaces. As Adam mentions, you should be able to clean all of the exterior trim pieces in about 15 minutes.
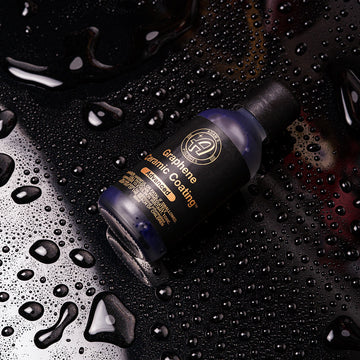
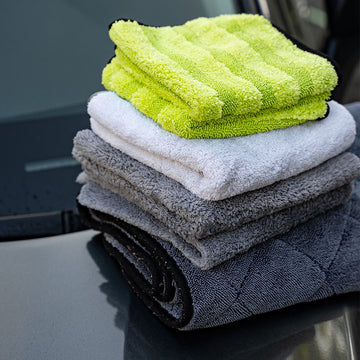
With everything clean, decontaminated, and oxidation removed from plastics, we can then move onto applying the Graphene Ceramic Spray Coating Advanced formula. Our Grey Microfiber Applicator and Borderless Grey Towels are the perfect accessories to apply and remove this spray coating very easily. Spray 3 or 4 sprays directly into the applicator, facing away from the vehicle to avoid overspray misting onto other areas - the chemical travels far, so this will help you to avoid fixing high-spots later. If you are unfamiliar with the term high-spot, a high-spot is an area where the coating was not fully wiped away and then dries into a cloudy or hazy spot. Apply the coating to the panel in long, up-and-down or left-right motions, making sure to overlap each pass slightly for even and complete coverage. You will notice the panel instantly darken as you apply it with a deep, wet look, then after 20-30 seconds or so, the coating will begin to have a rainbow-like look, almost like an oil slick on the surface. You will see this "rainbowing" more easily on darker colored paints, but it can still be visible on lighter colors too. As Adam mentions, if you are having difficulty seeing this rainbow effect, put a small amount of coating on a dark tinted portion of glass to monitor the "flash time" of the coating.
Once this rainbow begins to dissipate into a more cloudy or clear look, the coating will have a slight stickiness to it, and that is when you will wipe away the residue using a plush Borderless Grey Microfiber Towel. Fold the towel into fourths, and keeping it flat on the surface, do an initial light swipe using very light pressure to even out the coating, then flip the towel over to a clean side and wipe very thoroughly to remove the remainder of the residue. Make sure to wipe past the edges of the panel you are working on, since the coating will smear into the next panel - if you miss these areas, that is typically where you will see high-spots later. Depending on temperature and humidity, it could take anywhere from 2-5 minutes or more for the spray coating to set up and flash before it can be wiped away. The higher the temperature and higher the humidity, the more quickly it will flash, so you may find that you need to wipe it away more quickly in these scenarios. Then move onto each panel and repeat this process. As you get more comfortable, you may find that you can do 2 panels at once, but we would not recommend stretching beyond that if you are new to applying coatings, as that is how you may end up with streaks and smears if it sits on the surface too long on one panel as you are wiping the panel next to it.
So what happens if you miss an area or let it flash too long and you have streaks or high-spots to fix? There is no need to stress when using the Graphene Ceramic Spray Coating Advanced. It is very forgiving in terms of fixing errors, and you will have errors - no one is perfect, and you will find some spots where you missed wiping or didn't wipe the coating off enough. If you find a spot that you missed fully wiping away the residue, and it does not wipe away with just the towel, simply mist a spray or two into the applicator, re-wipe over the area with the applicator, and then immediately wipe away the residue with a Borderless Grey Towel. You may find that after you apply the coating to about half of the vehicle, the towel will be very saturated with coating residue and may smear more frequently, so this is a good indicator to grab a second fresh towel to finish the vehicle with less chances of high-spots. When coating plastic and rubber trim, make sure that you thoroughly wipe away excess residue - if too much of the solvent and ceramic coating sits and dries into the plastic, on certain plastics it could discolor, so just make sure to wipe the coating from plastic just as you do paint, glass, lights, and so on.
Once you have protected all of the body panels, it's time to move onto the wheels. It's a good idea to do the wheels now, because they may still have traces of dirt and metallic brake particles that could get into the applicator pad, which you do not want to spread onto body panels and potentially scratch them. Coat the wheels just as you would do the paint, but keep in mind that you may not see the rainbow effect on polished and clear coated wheels and other light colors like silver. Instead, go by feel of the coating, and once it starts to get a little sticky after a few minutes, that is a good indicator to wipe away the residue. If you have the time and equipment, now is a great idea to lift the vehicle, safely remove the wheel, and clean and coat the inner barrel as well as the outer spokes and the painted brake caliper too. By coating all of these areas, it will make them easier to clean in follow-up washes, as the brake dust will not stick as easily to the coated surfaces. With the wheel off, this will give you easy access to apply the Graphene Ceramic Spray Coating Advanced to the caliper and to the inner fender liner if it is plastic. Coating the inner fender liners will darken them up and make mud, dirt, and debris stick less. Once you're done, make sure to properly reinstall the wheel and torque it to the proper specification!
Lastly, since you clayed the glass earlier, now is the time to apply protection to the windshield, to improve your visibility during harsh driving conditions. Our Graphene Ceramic Glass Coating is a special formula designed specifically for glass, that is very easy to apply and will last longer on glass than the spray coating. The Graphene Glass Coating does not abrade away as easily on glass with wiper usage, and it is extremely water repellent at speeds of around 40 mph and above. And with that, you have now decontaminated your vehicle with clay, cleaned the plastic trim, and protected nearly every exterior surface in under 2 hours! Thanks for watching and enjoy your freshly protected car!


