We hear it from customers and enthusiasts all the time: "No I don't want to use a machine, it will burn the paint" or "No those machines put swirls into the paint" or "No I'm afraid to use a machine." This video and quick writeup are here to assure you that all of those statements can be put to rest with the right type of machine polisher, the right pads and chemicals, and the right technique. Adam walks you through the process for a beginner polisher, by working on a nice fox body Mustang at The Vault in Arizona, but the paint has seen better days and could greatly benefit from a paint correction by using a machine polisher.
The paint on this Mustang is the perfect candidate to show how much shine potential a vehicle may have hiding underneath years and years of imperfections. These imperfections - light scratches, water spots, swirl marks, and more - are a reality when driving and enjoying a vehicle throughout its lifespan, but there are things that can dramatically expedite how quickly the paint finish can become dull, hazy, or scratched. Paint correcting your car with a machine polisher should not be a scary or stressful situation because technology in machines has improved greatly over the last 20 years. Large rotary buffers that run at high speeds with a fixed rotation generate lots of heat, which can burn paint especially on edges where the clear coat or paint can be much thinner. Rotary buffers will "walk" on the panel if you aren't holding onto the machine firmly, and can leave holograms, halos, or buffer trails without the proper pad and technique. Random orbital polishers on the other hand, are the exact opposite of the last two sentences referencing rotary machines. Random orbital polishers like the Swirl Killer Mini Pro that Adam uses in this video oscillate the backing plate and pad in hundreds of random directions. These random orbits create less heat, at slower speeds, and finish down much better. These machines are much easier to control as well - since they are not a fixed rotation, they will not walk all over a panel, and will generally stay in a spot until you use your arms and hands to guide the machine.
Before we begin machine polishing with a random orbital polisher, there is one more step we need to accomplish first, decontaminating the paint. The paint on your vehicle can develop many different types of bonded contamination simply from regular driving or being parked in the wrong area at the wrong time - paint overspray, tree sap, etching from bird droppings, baked in bug splatter, industrial fallout, and more. All of these different types of contamination can become embedded into the clear coat, and when you gently wipe your hand across the clean surface, you will feel a less than smooth surface and definitely hear it. It will sound almost like sandpaper as you wipe your hand back and forth, and as Adam often says "Your paint should not have an audio track!" If you leave these contaminants on the surface, the machine polisher pad will spin, oscillate, and grind them into the clear coat even further, which will make the pads become dirty and wear out much more quickly, and possibly cause more harm than good to the paint. Adam uses our Visco Clay Bar along with Detail Spray as a clay lubricant to glide the clay across the surface and pull all of that bonded contamination out of the paint and into the clay. Once that particular "side" of clay becomes saturated, you stretch and fold the clay until you have a new clean work surface, and continue on claying each panel.
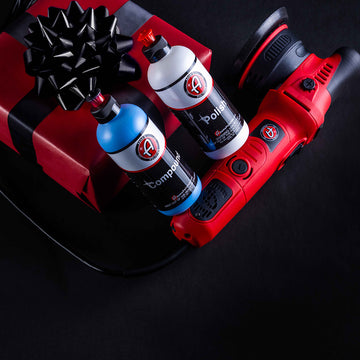
With the panel decontaminated, it's now time to wipe away the majority of the Detail Spray and clay residue to inspect the area and see the severity of swirl marks, scratches, and other damage. In the case of this Mustang, there was a heavy amount of swirl marks, so Adam chose a small test area to see what combination of chemical and pad type were necessary to restore this finish. In this video, he is using the Swirl Killer Mini Pro 3.5"-4" pads and has a 12mm orbit pattern. It's an excellent choice for a starter machine since it has a smaller physical footprint, which makes it easier to maneuver around tight areas, along with the smaller diameter pads to access smaller areas, both of which will give you more confidence in polishing, especially when you are just starting out with paint correction.
Pro-Tip: Use one less drop of Polish or Compound than the size of the foam pad you are using, so 4 drops for a 5.5” pad and 3 drops for a 3.5” or 4” pad.
Adam starts with the least aggressive approach first, using our white Polish and a White Foam Pad, designed for the finishing stage to bring out the most clarity in paint, to see how much correction can be accomplished without using a more aggressive compounding approach. Using 3 small drops of Polish on the pad, with the machine speed set to 4 out of 6, Adam works the polish over the surface in left-right and then up-down motions, or a cross-hatch pattern, with about 15-25% overlap with each pass to ensure full and even coverage on the panel. Do 2-3 “passes” in each direction before wiping away the residue to inspect the surface. After polishing the surface, there was a considerable improvement, but Adam still rates the correction at a “C-” on a grading scale, and the goal is to achieve as close to an “A” finish as possible, so this Mustang will need a multi-stage correction with Compound first and then Polish to achieve that goal.
Pro-Tip: Make sure not to cover cooling vents with your hands, and always start and stop the machine with the pad touching the surface to prevent product from slinging on you and all over the rest of the car.
Since the White Foam Pad and Polish is intended more for finishing, it did not quite provide the results that Adam wanted for this Mustang, so he then went up one step in correcting ability to the Blue Foam Pad and blue Compound. This combo is right around the medium level of correcting strength and the least aggressive compounding approach. After spreading the Compound in the same test area on speed 2, he then bumped the speed back to speed 4 and slowly did his cross-hatch passes over the area. Adam graded this second attempt at a “B+”, but his goal is still to make this finish even better, so then he stepped up to the more aggressive Microfiber Cutting Pad, again with the blue Compound.
Pro-Tip: Brush out the Microfiber Cutting Pad after every section that you correct, to stand the fibers back up for best correcting ability. Use a garbage can to keep all of the compound dust from scattering everywhere. Another great option for cleaning out pads is compressed air, if you have that available in your garage.
The Microfiber Cutting Pad was able to get the paint to the “A” finish that Adam was looking to achieve. We offer even one more notch above this pad, the Heavy Cutting Wool Pad, which is very aggressive and generates heat very fast, but it was not necessary on this particle vehicle. The Heavy Cutting Wool Pad is great for vehicles with very hard clear coats, like most German vehicles, but it is a pad that you need to be careful with and monitor closely to not cause damage to the finish from too much heat or too many passes at once.
Pro-Tip: How much pressure do you apply when compounding? It’s easy - as much pressure as you can push down with just your thumb on the Adam’s A logo at the top of the machine above the polisher head, backing plate, and pad.
The scratches and imperfections are now gone, but the Microfiber Cutting Pad (and wool pad) leave some slight haziness, leaving a grayish look to the black paint. So Adam then switches back to the White Foam Pad and white Polish that he started with, to get the clear coat looking as deep, dark black as possible. Now that you know the process that is required to get your car to perfection, you can now repeat this process for the rest of the vehicle. Keep in mind that if it’s your own vehicle, you don’t have to rush through things. Do a few panels in each session until you are happy - this way you can stay relaxed. Machine polishing should be a fun, rewarding process. Another one of Adam’s famous quotes is “Never polish angry.” Don’t get fixated on fixing that one annoying scratch, going over it again and again and again until you heat it up so much that you burn through the clear coat. Do one set of passes, then take a break or clean a wheel or polish a headlight to let the other area cool down a bit before attacking it again. Then once you’re happy with a panel and it has that “A” finish, lock it in with some nice durable protection with our Graphene Ceramic Spray Coating Advanced. We hope you now have the confidence to do some very rewarding paint correction on your ride!
