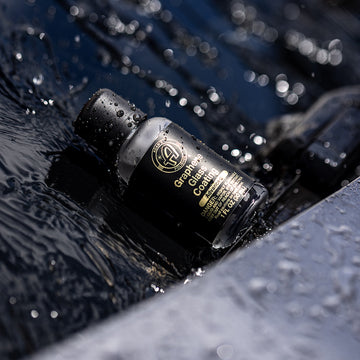
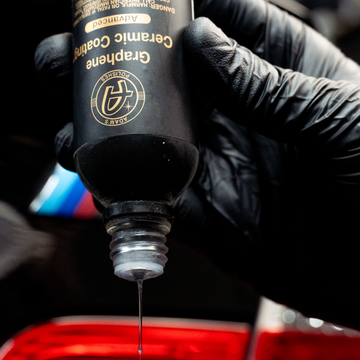
So you have spent the time and money to have your car ceramic coated, for outstanding levels of gloss, protection, and water-repelling behavior, but now you may not know the best ways to clean and maintain that investment. We’re here to help! Whether you did the work yourself or had a reputable detailer or business perform the work on your vehicle, ceramic and graphene ceramic coatings do require some maintenance. You may have heard or read phrases like “Never wash or wax your car again!” in regards to ceramic coatings, but these types of statements simply are not true. While it is true that a graphene ceramic coated vehicle is much easier to clean, since dirt and other contamination don’t stick to surfaces as easily, they do still get dirty and need proper cleaning and upkeep to make sure that the effectiveness of the coating lasts for several years.
Graphene Ceramic Coating™ and Graphene Ceramic Coating™ Advanced are the two strongest and most durable protection options that we offer, but they are not “bulletproof” as others may advertise ceramic coatings. If you apply a coating to your vehicle and then do nothing afterward, and simply just drive your car and give it the occasional wash every month or two, the ceramic coating will eventually begin to wear down over time or not perform as well as it should. In this write-up, we’ll explain why and how ceramic coatings can become contaminated, and some easy steps you can take to keep your coated vehicle looking and performing its best. We will split these steps up into 3 types of maintenance processes - Washing, Heavier Decontamination, and Regular Upkeep.
Maintenance On A
Ceramic Coated Vehicle
Introduction
Washing
For the most part, washing a graphene ceramic coated vehicle is much like washing any other vehicle. You need to exercise proper washing procedures using safe products and tools, in order to reduce the chance of wash-induced damage like light scratches and swirl marks to as minimal as possible.
This means that automatic car washes with brush systems are highly discouraged. These large, spinning brushes can trap dirt and debris from previous vehicles that have run through the wash bay throughout the course of the day, and this debris will then contact your vehicle. While Graphene Ceramic Coating™ does provide a stronger and more resistant surface on your vehicle, it can still scratch and develop swirl marks, so if you are using automatic car washes, we strongly recommend using touchless wash bays. Never use their wash brushes on your paint. While it may be tempting to grab that brush hanging on the wall of the wash bay, you have no idea what type of off-road vehicle may have used that brush before your arrival!
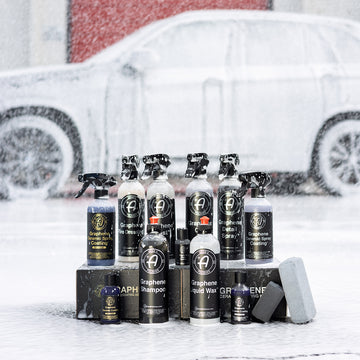
Automatic car washes sometimes use heavy degreasing soaps to clean the vehicle. These typically will not harm a ceramic coating, since coatings are very resistant to strong cleaner chemicals; however, if the automatic car wash bay has a “wax” or “sealant” step after cleaning and rinsing, this step can alter the performance of your ceramic coating, so it is recommended to skip these options during the wash. Sealants and waxes will not harm or damage a graphene coating, but you would be applying a different product family on top of the coating layer. This can cause reduced water repellency, increased surface tension, and possibly even a streaky or dull appearance if the protection step is not rinsed or wiped away properly. For these reasons and more, we developed Graphene Shampoo and Graphene CS3 to serve as excellent maintenance washing options suitable for any vehicle. We’ll take a look at each below.
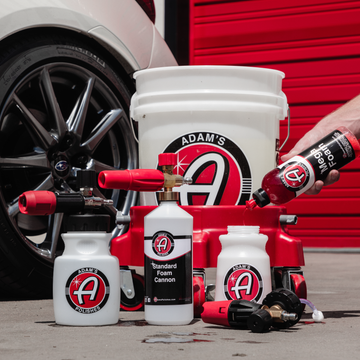
Any of Adam’s foam and shampoo options are safe for use on a graphene coating, but some options are better than others in some instances. For weekly washes, Adam’s Car Shampoo and Mega Foam offer high-sudsing and high-foaming soap options that are pH-neutral, will not remove or add any protection, and rinse spot-free. Sometimes though, you will need a more powerful cleaning solution, and this is where Adam’s Graphene Shampoo is a perfect choice. Graphene Shampoo combines citrus-based degreasers with high-foaming surfactants to help decontaminate, revitalize, and maintain ceramic and graphene ceramic coatings. This high-lubricity solution works exceptionally well when used with a pressure washer and foam cannon, or with a foam gun and garden hose, and Graphene Shampoo can be used in your soap bucket as part of a Two Bucket Wash Method as well.
After pre-rinsing heavy dirt and debris from the vehicle, using 2-3oz of Graphene Shampoo in a foam cannon mixed with water will create a nice foam layer to foam down the entire exterior of the vehicle. The foam layer may not be as thick as some of our other foaming soaps such as Mega Foam, but it will dwell on the surface to begin to break down road films, grime, and other contamination that can build up on vehicle surfaces, whether they are ceramic coated or not. Once the foam begins to drip down the surface and is no longer clinging, we recommend rinsing it off with the pressure washer to remove as much contamination from the surface as possible before touching the vehicle with a wash pad or wash mitt. Then foam the vehicle down a second time if there is still solution remaining in your foam cannon. Using about 1-2oz of Graphene Shampoo in your wash bucket, proceed to do a Two Bucket Wash with your wash pad to clean remaining dirt and grime that foaming alone did not remove. Combining the process of foaming the vehicle down first with your Two Bucket Wash is the best way to avoid or reduce the chance of wash-induced swirl marks or light scratching.
Including additional surfactants into Graphene Shampoo allows this premium soap to still have a high-sudsing, powerful cleaning formula while adding some extra protection during the wash. The graphene ceramic resins found in Graphene Shampoo aid in refreshing and revitalizing the graphene coating on your vehicle as you wash, enhancing protection even further. Graphene Shampoo provides an extremely slick and lubricated feel when washing, which again reduces the chance of scratching and allows for a safe and enjoyable washing experience. This shampoo behaves similar to our Wash & Wax in that when you rinse the soap residue from the surface, you may see a sheeting behavior with the water rather than beading and repelling action. This is because the protection properties of Graphene Shampoo do take a few hours to cure onto the surface. Alternating Graphene Shampoo every 2-4 washes with our other soaps like Car Shampoo or Mega Foam will provide a continual maintenance schedule on your vehicle, so that stubborn contamination never becomes too out of control.
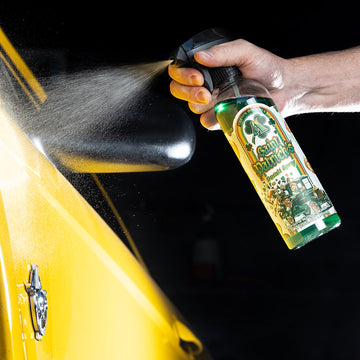
Graphene CS3
Building on the very popular formula of our CS3, we offer a graphene-infused version of this product that cleans, shines, and protects in one spray-on and wipe-off solution. If you are not familiar with our CS3 or Graphene CS3, they are specially formulated cleaning chemicals that allow you to safely wash the exterior of a slightly dirty vehicle, without the use of water. For instances where your car may have some dust buildup, or maybe just a small amount of dirt where you may not want to set up your hose, buckets, wash pad, pressure washer, drying towels, and more for a traditional wash, Graphene CS3 is a great alternative to clean and protect your vehicle in a fraction of the time. Building upon Graphene Shampoo, Graphene CS3 utilizes a highly lubricated formula to allow microfiber towels to glide across the surface as it lifts and pulls away dust and dirt while reducing the chance of scratching. It has shine enhancement similar to our traditional Detail Spray to give incredible gloss as it cleans, and durable protection that can last upwards of 2 months per application, by incorporating reduced graphene oxide into the silica backbone of the original CS3.
Some of our customers are initially hesitant with using waterless washing products, but once they try the products and use the proper process, they usually change their minds after they see the results they can achieve. When used with the proper towels, Graphene CS3 will not streak, smear, or scratch surfaces. You will usually want around 4-6 clean microfiber towels to perform a waterless wash with Graphene CS3, depending on the size of your vehicle. We recommend our waffle-weave Waterless Wash Towels if you are removing dirt, since the waffle pockets of the towel will pull dirt up into the towel, rather than drag on the surface. You can then do a final wipe of the panel or area with a Single Soft or Borderless Grey Towel for a streak-free finish. You may ask “How does Graphene CS3 differ from Graphene Detail Spray - aren’t they the same thing?” but they are two separate and unique products. Graphene CS3 has specific cleaning surfactants, emulsifiers, and other ingredients designed to remove dirt safely, whereas Graphene Detail Spray is best-suited as a topper for surfaces that are already clean. We’ll explain Graphene Detail Spray more later in this article.
Heavier Decontamination
Graphene Shampoo and Graphene CS3 will certainly make your vehicle clean and shiny, but they may not always be enough to remove heavy bonded contamination, iron particles, and iron deposits that embed into paint, chrome, and other exterior surfaces. Bonded contamination can occur from many instances, driving conditions, or environments. Vehicles may come in contact with over spray mist in the air from a neighbor painting a fence or spraying pesticide for weeds, road construction dust, industrial fallout from a nearby factory, minerals from rain, road oil films, sand particles from the beach, tree sap, salt, ash, and magnesium chloride from winter driving, and more. These types of contamination can become bonded with the surface of your vehicle, meaning that a typical wash or even a pressure washer may not fully remove these films.
Iron deposits are a second type of contamination that eventually build up on both coated and non-coated vehicles and can be difficult to remove. These iron particles appear as tiny brownish-orange dots, almost like a rust spot the size of a pinhead or smaller, and they especially stand out as an eyesore on lighter colored vehicles like white, silver, gray, and so on. There are specific ways to safely remove each type of contamination, whether they are ferrous (containing iron) or more organic substances. In other words, what works on iron and metal particles may not work well on other contamination, and vice versa. First we will discuss how to remove iron decontamination from a graphene coated vehicle with Adam’s Iron Remover, then we will move into removing other non-ferrous types of bonded contamination from a ceramic coating, using our Fine Grade Clay.
Adam’s Iron Remover is a spray-on and rinse-off decontamination chemical designed for a specific purpose - to safely target and dissolve iron deposits that embed into the exterior painted surfaces of your vehicle. As mentioned above, iron contamination can be present on any vehicle, but you will usually only notice it on lighter colored paints like white and silver, since it appears as very small orange dots that really stand out on white paint! These orange dots will usually be more concentrated to the lower parts of doors, rocker panels, behind tires, the rear bumper, and trunk panel. These are the areas where brake dust will travel back onto the vehicle as you are driving and using the brakes. Dust on streets can also contain metal particles from vehicle exhausts traveling on the roads every day, which tires can then kick up onto the vehicle. You may see significant iron deposits on the front bumper as well if you are frequently in bumper-to-bumper traffic, where the vehicle exhaust in front of you could be putting deposits onto your car.
These pesky orange dots can be difficult to remove. You can scrub and scrub them with soap and a wash pad and not even reduce their appearance, and possibly scratch the surface in the process from scrubbing so much. You can clay them with a clay bar and maybe reduce half of the dot, but be frustrated that it did not go away completely. You can machine compound them off, where you run the chance of overheating the paint or removing more clear coat than you would like to in very focused areas at a time. As the saying goes, work smarter not harder - Adam’s Iron Remover eliminates these frustrations and takes care of these iron oxide particles with far less effort than the methods mentioned above. We recommend using Iron Remover after you have washed and rinsed the vehicle of normal dirt, mud, and debris - this way the chemical contacts the surface directly rather than having to try to cut through dirt first. Work in the shade if possible, or wait until the evening or early morning when direct sunlight is not as harsh.
Iron Remover should not be used on a warm or hot surface, so allow the vehicle to cool off or rinse it again with cold water before use. Spray Iron Remover generously and directly onto a painted surface, and allow it to dwell for a few minutes. On light colors, you will begin to see it turn these orange dots into a purple color as the iron activator ingredient begins to dissolve them. It will appear as if your vehicle is bleeding purple streaks down the panel - this is normal and expected. Do not let this purple residue dry onto any surface. Once it has worked on the panel for a few minutes, rinse it very thoroughly with your hose or pressure washer and you should find that the orange dots are now gone! For very stubborn iron deposits, you may have to do this process a second time. With the surface now decontaminated of iron and metal particles, it’s now time to decon with Fine Grade Clay to make the surface smooth, unclog the coating, and bring back that awesome water-repelling behavior that you expect.
Note: It is very important to mention that Iron Remover can stain or discolor plastic trim and other non-painted surfaces, such as window trim, roof rails, plastic mud flaps, etc if it sits on these surfaces for too long or dries onto these components. Never let it dry on any surface. Exercise care when spraying the product to avoid these areas, and when you do rinse a panel, make sure to rinse all surrounding areas, plastic, and rubber trim.
Sometimes a degreasing wash with Graphene Shampoo may not be strong enough to remove all contamination. The vehicle may look clean and very shiny after a wash, but you may notice that your drying towel seems to drag on the surface a little or you may feel a clean door panel or trunk and it may still feel bumpy or make some audible noise as you gently rub your hand on the surface. As Adam always says “Your paint should not have an audio track.” If your paint begins to feel rough or bumpy with bonded contamination, and sounds like sandpaper when you gently glide your hand over the clean surface, the protection layer underneath is not going to perform as well. You could use Compound or Polish to remove this contamination, but you do not want to risk weakening or removing the graphene coating with micro-abrasives and a machine polisher, or causing scratches by picking up contaminants in a machine polishing pad that is oscillating thousands of times per minute on the surface.
Using a clay bar is the safest option to remove contaminants while having minimal potential for damage or weakening the coating. Like with many aspects of detailing, the least aggressive method approach applies here as well, so this is why we recommend our Fine Grade Clay. It is our softest and most delicate clay option, so it will have the lowest chance of weakening the coating or creating any marring on the surface. By “marring,” we mean very light scuffs or haze introduced into the clear coat. Clay, by design, is very slightly abrasive. If you do not stretch and fold the clay to a new clean work surface often enough, or if you do not keep the panel lubricated enough with Detail Spray, there is potential to introduce very light damage into the graphene coating layer.
Two common misconceptions are that you should never have to use a clay bar on a ceramic coated vehicle or that you cannot clay a coated vehicle at all. We disagree with these statements. Graphene coatings can and will still build up contamination over time that needs to be removed in order for the coating to perform its best. At a minimum, we recommend claying the areas that come in high-contact with road debris - the sides of the vehicle, bumpers, and the trunk/tailgate - at least twice per year, but you may find that you need to use Fine Grade Clay more often or less often than this, depending on your driving conditions and how frequently you drive your vehicle. Only clay a surface after it has been washed - if you clay a dirty surface, the clay bar will become saturated with dirt and grit, which can then scratch paint. You want to use the clay to remove the bonded contamination that is still present after washing, not the dirt itself. For a full explanation and demonstration on claying your vehicle, Adam covers this topic in this video: How to Properly Decontaminate A Vehicle With Clay.
Regular Upkeep
Your vehicle is now decontaminated, but routine maintenance isn’t quite finished yet. It is best practice to have a regular upkeep program in order for the graphene ceramic coating to perform as intended and last as long as possible. With the surface clean and feeling slippery smooth, now is the time to give a boost to the coating to further enhance protection against minerals in rainwater, bird droppings, bug splatter, mud, and more. The better protected the surface is, the easier it will be to clean and less chance these things bond to surfaces.
We already mentioned Graphene CS3 earlier in this write-up, and it is a great maintenance choice for a slightly dirty vehicle, but there are a few more easy to use graphene-infused products to refresh a graphene ceramic coating that we have not yet covered in this article, Graphene Detail Spray and Graphene VRT. These products pair perfectly with a ceramic coated vehicle due to having chemistries in the same product family, but they are safe for use on non-coated vehicles as well. Let’s take a look at each to see how they may fit into your detailing plan.
Similar to how our Ceramic Boost is used to enhance and extend the life of a ceramic coating, Graphene Detail Spray is made to be used as a quick detailer for your graphene ceramic coated vehicle. Graphene Detail Spray works very similarly to our original pink Detail Spray by lightly misting it onto a clean surface, thoroughly wiping it into the area with one side of a folded, plush microfiber towel, and then flipping the towel over and wiping the area again to leave exceptional shine and an incredibly smooth finish. On darker colored vehicles, we recommend using two towels for this process to avoid any potential streaking or smearing. Use one plush towel to wipe in and absorb the majority of the Graphene Detail Spray, and then use a second dry plush towel to wipe away any remaining residue. As the first towel becomes more saturated with each new panel or area, you will notice that it does not always wipe away as easily, so that is why having a second dry towel is important to making this process frustration-free and more enjoyable.
Graphene Detail Spray is much more durable than our traditional Detail Spray, so you can see up to 1-2 months of protection per application. On daily driven vehicles, we recommend using it every 3-4 washes or once a month to keep a continually slick surface that looks great. A little bit goes a long way - 1-2oz of Graphene Detail Spray is usually enough to treat a car or midsize SUV. Spraying too heavily can make it more difficult to wipe away evenly, and cause the streaking or smearing mentioned earlier. Be sure to use quick, full-pull sprays on the bottle trigger about 1-foot away, so that the Graphene Detail Spray atomizes properly into a fine mist to cover a larger area of a panel, rather than spraying it up close and causing it to be too focused in a small spot. Our optional accessory Continuous Spray Bottles are a very easy way to get the finest misting spray consistently every time. Use Graphene Detail Spray on paint, glass, and chrome exterior surfaces, then we’ll wrap this discussion with Graphene VRT for enhancing and protecting exterior plastic and rubber trim.
You can use Graphene Detail Spray on textured plastic and rubber trim, but it may not always apply easily or give an even or more rich appearance on these materials. Using the right product for the right job has been the theme throughout this write-up, and it applies here too. Graphene VRT is a thick cream dressing product that is spread onto a surface using a foam Block Applicator or Pro Tire Hex Grip Applicator. It is used to darken faded rubber and plastic, giving a premium satin appearance without too much shine. Graphene VRT is an evolution of our original VRT. It applies in the same manner, but has increased durability per use due to including graphene ceramic resins in the formula. This formula can last upwards of 1 month or more on plastic and vinyl surfaces, but you may need to apply it more frequently if using it on tires, since the road, rain, and strong wheel cleaners will weaken it.
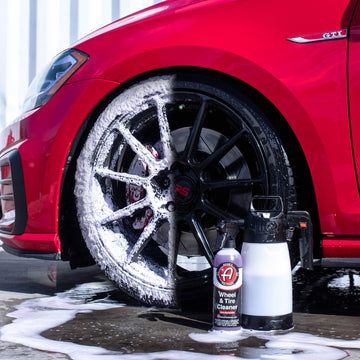
Once a surface has been thoroughly cleaned (we recommend our Tire & Rubber Cleaner for heavy degreasing of textured plastic and rubber components), treating it with Graphene VRT will provide a similar water beading and repelling action as a painted surface protected with Graphene Ceramic Coating™. You will see tiny water droplets bead and roll off of a tire sidewall, plastic bed rail, or tonneau cover. Because of its thick viscosity, Graphene VRT has a tendency to cling to surfaces better, and once cured, it will not streak or drip down surfaces when it becomes wet, like you may have experienced before with our original VRT. For best performance, we recommend allowing it to cure into surfaces for 15 minutes before wiping away excess material with an Edgeless Utility Towel, then allow it to cure even further for several hours or 1 day before exposing these surfaces to moisture or rain. Graphene VRT provides protection against UV fading and discoloration, and it’s not just for the exterior - it works great to treat engine bay plastics and rubber hoses as well.
Maintenance Summary Chart
Below is a chart summarizing each of the maintenance products that were covered in this write-up, to explain their intended uses, how often we recommend using them at a minimum, the corresponding accessories, towels, and applicators that they work best with, and the level of effort to use each, on a scale of very easy to very hard.
| Product Name | Intended Uses | Frequency of Use | Companion Products | Ease Of Use |
|
Graphene Shampoo |
More thorough washes that require more degreasing power |
Every 3rd or 4th wash |
- Foam Cannon |
Very Easy |
|
Graphene CS3 |
Removal of dust and light dirt while adding shine and protection |
As necessary to remove light dust or dirt |
- Waterless Wash Towel |
Medium |
|
Iron Remover |
Targets and dissolves iron deposits from metal sources like brake dust that appear as tiny orange dots |
As necessary when coating performance degrades or to remove orange dot contamination |
- Pressurized Multi Sprayer - Garden Hose or Pressure Washer for rinsing |
Easy |
|
Fine Grade Clay Bar |
Removes other types of bonded contamination in the least intrusive way possible |
As necessary when coating feels rough or performance degrades |
- Detail Spray |
Medium |
|
Graphene Detail Spray |
Quick shine and enhancement of hydrophobic properties |
Monthly, on a clean surface |
- Borderless Grey Towel |
Easy |
|
Graphene VRT |
Cream dressing used to bring deep color and durable protection to vinyl, rubber, and plastic exterior trim |
Monthly, on a clean surface |
- Block Applicator - Pro Tire Hex Grip Applicator |
Very Easy |
Summary
In this blog, we detailed recommended processes on how to wash and maintain a vehicle protected with Graphene Ceramic Coating™. Then we covered how to safely remove more heavy contamination that a normal wash may not fully remove, and which products to use to accomplish this. We finished up with some quick upkeep products to extend the life and performance of various coated surfaces, and provided a quick explanation chart, to summarize each product and what companion products you need to use with them. If you are uncertain about any product or process, or have any questions in general, feel free to contact us at tips@adamspolishes.com, or reach us on our online communities on Adamsforums.com, Instagram and Facebook, as well.


