SAFE CAR
WASHING METHODS
Cart
Your cart is empty
SAFE CAR
WASHING METHODS
Improper washing technique is the #1 culprit for creating swirl marks in the finish of your vehicle. If you’ve spent many hours in the garage or driveway polishing your vehicle to near-perfection, the last thing you want to do is an incorrect wash process and reintroduce imperfections like swirl marks, haze, and scratches back into the finish! Improper drying comes in as the second biggest culprit of swirl marks and scratches. However, you do want to wash your vehicles frequently to keep the surface free of contamination. That contamination can harm the surface even further causing premature rust, permanent staining into chrome, etching in your clear coat, and so on. In this blog, we’ll take an in-depth look at safe washing and drying processes to ensure your vehicle looks great for many years to come!
Machine polishing your vehicle to get the paint as flawless as possible is typically a multi-step process that can take many hours to complete - all of that hard work can be wasted with just one wash cycle through an automatic brush-type car wash, or even improper washing at home with the incorrect wash accessories or steps. Using the wrong wash media and not following a Two Bucket Wash Method with Grit Guards can contribute to creating new swirl marks. If you aren’t familiar with the Two Bucket Wash Process, there will be a full explanation below.
Drying your vehicle also has the potential of putting significant scratches and swirl marks into the surface if not done properly and with the right accessories. Gone are the days of drying your vehicle with a cotton bath towel or even chamois that is simply not soft enough or the proper material to dry a vehicle without causing damage. Advancements in microfiber towels and forced air blowers have greatly reduced the chance of harming the vehicle’s finish while drying. Each of these will be covered below as well.
Preparing all of your items before you begin the wash process is another factor in minimizing any potential wash-induced damage. If you’re running back and forth to the garage to grab drying towels, bottles, brushes, etc, this is an unnecessary time where hard water could be sitting on the surface and causing water spotting or even etching into the clear coat. Having both wash buckets with wash pads, soap, a wheel and tire bucket with all of your brushes, foam cannon or foam gun, drying towels and blowers, and so on all easily accessible and ready to use will save time and keep you focused and on-task. We will break down a few key prep aspects below - Two Bucket System, Choosing the Right Shampoo, Wash Media Options, and Drying Options - and then we will give a summary of the Wash Process steps from start to finish.
Washing Preparation
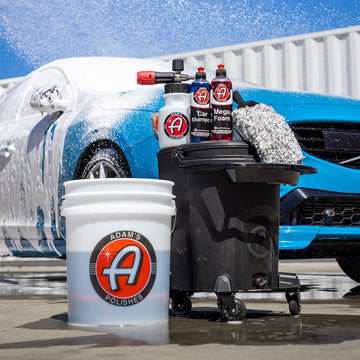
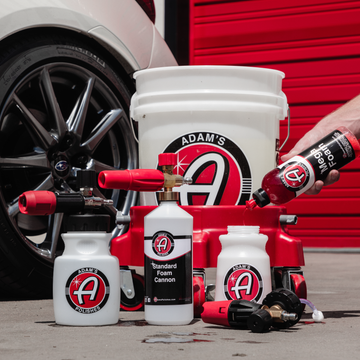
One very important aspect of safely washing your vehicle is the Two Bucket Wash Method. For those not familiar with what this is, the Two Bucket Wash involves having one bucket for your premium car shampoo and a second bucket filled with clean rinse water. Both buckets should have either a Grit Guard or Dirt Lock at the bottom of the bucket, to act as a dirt filtering system. When washing, you will load up your wash pad or wash mitt with soap from the Soap Bucket, gently wipe it across the vehicle for a few passes on each side of the pad/mitt until it has dirt build-up, and then place it into the Rinse Bucket and scrub it against the Grit Guard or Dirt Lock to free the dirt.
The Grit Guard and Dirt Lock act as scrubbing grates - as you scrub the wash pad against them, dirt is removed and pushed downward into the bottom of the bucket. The four vertical slats of the Grit Guard and the tapered channels of the Dirt Lock both serve the same purpose in that they prevent water from sloshing around, which then keeps as much of the dirt as possible at the bottom of the bucket, out of the Soap Bucket, and ultimately out of your wash pad. After you have scrubbed the wash mitt, you then restart the process by loading it up with fresh clean suds from the Soap Bucket. For very delicate clear coats and darker colored vehicles like black, gray, dark blue, and so on, we would recommend cleaning the wash pad more frequently on the Grit Guard, sometimes as often as after completing one pass over the vehicle with each side of the wash pad.
Pro Tip: Warm water in the wash buckets can make it easy on the hands during those cooler wash days!
In the comparison chart above, we show some key differences between the Grit Guard and Dirt Lock. The Dirt Lock has an additional feature of having bendable rubber feet to hold it firmly into place in the bucket; however, with the Grit Guard, you can attach the Grit Guard Washboard (sold separately) to create an angled grate that curves up the side of the bucket. The Washboard works excellent if you decide to use a third Wheel & Tire Bucket, since you can easily scrub the brush heads onto the side of the Washboard where you may not always be able to easily reach the Grit Guard or Dirt Lock at the bottom of the bucket with different brushes like the Fender Brush or our Wheel Woolies. Click here to read our blog on Wheel & Tire Cleaning.
With your buckets in place, the next choice is which shampoo you will use to clean the vehicle. At Adam’s Polishes, we offer a variety of highly-engineered shampoo options, each designed for a specific purpose. Whether you are performing a routine maintenance wash, a heavy duty wash to strip away any protective waxes on the surface, or looking to enhance or refresh the hydrophobic properties of a ceramic coated vehicle, we offer a soap for each of those needs.
What follows below is a comparison chart outlining the capabilities and recommended amount needed for each shampoo, and then a more detailed description of each option. All but one of our shampoos are pH neutral, meaning that they can actually begin to dry onto the surface while washing and still rinse spot-free. It is better to leave the sudsy shampoo residue on the surface rather than hard water while washing, so we recommend washing the entire vehicle before rinsing off any panels. This ensures the smallest amount of standing water on the surface before you begin to dry.
Our standard shampoo. Adam’s Car Shampoo is great for maintenance washes. It creates a large amount of foam in a bucket, and a medium amount of foam in a Foam Cannon or Foam Gun. It does not contain any waxes or polymers for protection. While you will use more chemical per wash with this shampoo in a Foam Cannon, it is budget friendly and rinses spot-free every time. This soap is perfect for maintenance washing where you do not want to add or remove any type of protection. It will not leave any film residue and it will not enhance any type of protection.
Our most concentrated soap. Adam’s Mega Foam produces the thickest, most clinging foam out of all of our soaps when used with a Foam Cannon. This allows it to have longer dwell time on the surface to loosen and lift dirt more effectively before going over the area with a wash pad or wash mitt. Mega Foam produces a fair amount of suds in a Soap Bucket or Foam Gun, but it excels when used with a pressure washer and Foam Cannon - using minimal product in the process. Like our Car Shampoo, Mega Foam is great for maintenance washing and does not add or remove any protection on the surface.
Our heavy duty soap. This is not a soap to be used every wash. Strip Wash does just as the name implies, it strips away dirt and layers of protection like waxes and sealants. Strip Wash is a very powerful cleaner, so we strongly recommend to use it in the shade, out of direct sunlight, and rinse off the vehicle surface quickly afterward to avoid any streaks. For more durable sealants like H2O Guard & Gloss and Paint Sealant that you may have applied to the vehicle, Strip Wash may take more than one cleaning pass over each area to fully remove them. Adam’s Strip Wash will not remove a ceramic coating like our UV Paint Coating, UV Wheel Coating, or Ceramic Black Trim Restorer, as ceramic coatings are chemically resistant. Using Strip Wash on a coated vehicle is an excellent way to perform a deep-clean if you are wishing to re-apply a new layer of coating or a ceramic maintenance product.
Our upgraded, routine washing soap. Ultra Foam combines nearly all of the great benefits of our other soaps into one solution. It’s a very high-suds formula, at up to 10x the suds of a regular car soap. It provides a thick layer of clinging foam when used with a Foam Cannon and pressure washer - not as thick as our Mega Foam, but still very high on the scale in terms of foam level in our comparison chart above. It has high cleaning ability while special polymers add shine and protection enhancement too. It creates a very lubricated surface to help loosen and lift dirt and other contamination in a safe manner.
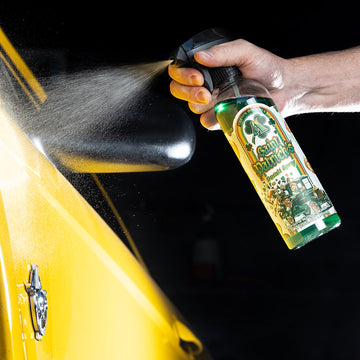
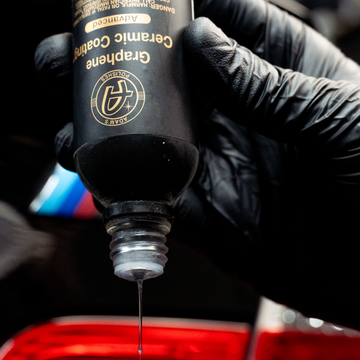
Our SiO2-infused shampoo. Adam’s Wash + Coat enhances a ceramic coated surface while washing. Wash + Coat refreshes the hydrophobic and self-cleaning properties of a coating by re-introducing a layer of SiO2 back onto the surface. SiO2 is silica dioxide, one of the key ingredients in ceramic coatings and ceramic-infused products. This product enhances gloss and depth and performs well in a bucket, Foam Cannon, or Foam Gun. After the initial wash, water will sheet from the surface when rinsing; however, once the product has had some cure time, you will notice strong water beading and repelling behavior during follow-up washes, rainstorms, etc.
Our soap option for that just-waxed look. Adam’s Wash & Wax is a pH neutral shampoo option that creates a fair amount of suds, but it will have less suds overall than something like our Mega Foam and Ultra Foam Shampoo, as a trade-off for more protection. Wash & Wax has built-in resins and some SiO2 infusion, so it will enhance any protection on the vehicle, or it can add a layer of temporary protection to a surface where the wax or sealant might be starting to wear down some. Much like Wash + Coat mentioned earlier, Wash & Wax does have an affinity for ceramic coatings. It does have a sheeting effect during the first rinse and then a bit of cure time for the SiO2 before it will begin to show excellent beading characteristics.
Now that we’ve explained the different shampoo options that we offer, you will need to grab the appropriate wash media product for the vehicle you will be washing. Remember, wash pads are one of the items in your detailing arsenal that touch your vehicle the most, so it’s extremely important to choose the best option for your vehicle to keep it looking its absolute best. Like our soaps, we offer several different options of wash pads and wash mitts, whether the vehicle has light or heavy dirt build-up, a delicate clear coat, or if you don’t like to maneuver a large, heavy wash pad while washing.
We do recommend using two wash mitts or pads for the washing process. One can be used on the upper half of the vehicle, and then a second mitt/pad can be used on the lower portions, bumpers, and the rear of the vehicle, which are typically the dirtier areas. This way you keep one mitt/pad as clean as possible for the more delicate areas like the hood, roof, trunk, and upper-half of the doors and fenders, where imperfections like swirl marks and scratches can be much more visible in sunlight. The comparison chart below gives a breakdown of each of our wash media options, and then we will provide a more in-depth description of each:
The Adam’s 10” Wash Pad is one of our best-selling wash accessories. It is made of a very soft synthetic wool material that holds huge amounts of sudsy, soapy water without being too heavy. It has deep scrubbing power for bug guts, dirt, and debris, but still soft enough to be delicate on your vehicle’s finish. Cleanup with the Grit Guard or Dirt Lock is moderate - the thickness and large size of the Wash Pad allows it to hold large amounts of soap, but smaller pieces of debris that get inside of the Wash Pad can sometimes take a little more scrubbing effort on the Grit Guard to remove them, or require you to pick them out with your fingers. The 10” Wash Pad can degrade more quickly than our other wash pads and mitts, but you will still use it for plenty of washes before downgrading it to use on the lower half of the vehicle, bumpers, exhaust tips and so on. We recommend cleaning this Wash Pad out by hand, scrubbing it against a Grit Guard and rinsing it with a strong stream from your hose rather than machine washing it. Machine washing can cause the wool fibers to twist together; however, if the fibers eventually do twist together, you can “fluff up” the Wash Pad again by combing it with a pet brush.
The Lambskin Wash Mitt is our most premium wash mitt that we offer. The Lambskin Wash Mitt is made for the garage queen or show vehicle that you want to pamper for the safest wash possible. If you’re cleaning a black vehicle with a very delicate finish that can easily develop faint swirl marks, this mitt is for you. It is the gentlest to greatly reduce the chance of wash-induced swirls - provided that you clean and scrub it out on the Grit Guard regularly while washing the vehicle. The leather-bound internal mitt structure keeps your hand dry and suds free while washing. It is a nice, manageable size for most vehicles in the medium size range. We recommend hand washing this mitt after each use and hanging to air dry.
The black and white Microfiber Wash Mitt is one of the best all around mitts in our lineup. It is made of a very premium 70/30 blend of a yarn-like microfiber that is incredibly thick and soft. This mitt has good cleaning strength, but is very safe on the vehicle finish. It is large in size to cover big surface areas more quickly, and it can feel heavier than some of our other wash pads and mitts. It rinses out easily, holds a nice amount of suds, and can be machine washed in much the same way as the Gray Microfiber Wash Mitt.
The Premium Microfiber Wash Sponge might be overlooked by some, but this smaller wash sponge performs outstanding. Completely wrapped in a very soft microfiber material similar to our Single Soft Towel, this sponge holds very high amounts of soap and suds inside to gently glide across your vehicle’s surface. The white color of the microfiber lets you easily see dirt build-up after one or two passes, and it cleans out fast and easy against the Grit Guard, ready to reload more soap and keep washing. The smaller size of this sponge makes it easy to grip and to reach tighter spots on the vehicle - in front bumper openings, around emblems, mirrors, behind door handles, and so on. The internal sponge design also makes it one of our lighter wash media options, so it’s not as heavy on your hands and arms.
The 10” Microfiber Wash Sponge is the perfect blend between our Microfiber Wash Mitt and the sponge ability of our Premium Microfiber Wash Sponge. This Wash Sponge will hold the most amount of water out of all wash media options. This will help water and suds fall down the vehicle as you wash/squeeze the sponge. It is made of a very premium 70/30 blend of a yarn-like microfiber that is incredibly thick and soft. It is large in size to cover big surface areas more quickly, and it can feel heavier than some of our other wash pads and mitts due to how much water and soap it can hold.
The last thing to prep before washing the vehicle is what type(s) of drying products you will use. As one of, if not the final media to touch your vehicle during the wash process, the choice is also important. We will go over both our various microfiber drying towels and forced air blowers. For a daily driver in the midsize sedan range, you may find a combination of the Ultra Plush Drying Towel and Blaster Sidekick works perfect for you - using the Ultra Plush to dry 80% or more of the vehicle without wringing out the towel, and then the Blaster Sidekick to finish off the rest like side mirrors, door handles, emblems, grilles, and wheels. The Sidekick can force the water out of these areas, where it tends to pool up.
For a large full size truck, this same combination will work, but having two Ultra Plush Towels or one Jumbo Plush Drying Towel will work better and more effectively. We also have a few chemicals that can serve as drying aids to further enhance shine and protection, or to reduce water spotting if you must dry the vehicle in a very hot, sunny environment. With all of our drying towels, it’s best to start by drying the windshield or rear window first for the towel to absorb some water and soften up a bit before moving onto the paint in a top-down fashion. As with the other Prep sections of this blog, we have a comparison chart below with key information on each drying towel, and then a summary of each drying towel and drying aid:
The Great White Drying Towel is one of the first drying towels that we introduced years ago. It has the same waffle-weave pattern as our Waterless Wash Towel but in a much larger overall towel size. It absorbs considerable amounts of water, but you will need to wring it out during the drying process or use a second towel. The thin design of this towel does make it easy to wring out, if necessary.
The Jumbo Plush Drying Towel is the most water absorbent towel that we’ve ever offered. It can soak up more than a gallon of water - 4 times as much as the Great White Drying Towel. You can easily dry an entire midsize vehicle without needing to wring out this towel. It can become fairly heavy during use due to how much water this two-sided design absorbs, so it pairs excellent with the Mini Plush Drying Towel, which can be used for the lower areas where you may not want the heavier Jumbo Plush potentially touching the ground or tires while drying.
The Mini Plush Drying Towel is the perfect accessory towel. Due to its smaller size, it works great to dry the lower areas of the vehicle, like rocker panels, bumpers, and wheels, without having to worry about one of our larger towels dragging into the ground and picking up some dirt or debris that could immediately do damage to the vehicle’s finish. The MIni Plush Drying Towel has the same design and construction as our Ultra Plush Drying Towel, so it’s a proven performer in a smaller form factor.
The Ultra Plush Drying Towel is one of our most popular drying options. This towel holds twice as much water as the Great White Drying Towel. The thick loop design on one side of the towel allows for high levels of water to be absorbed without leaving any droplets or streaks behind. This towel can dry most average size vehicles without issue, but for very large trucks and SUVs, you may need to wring the towel out or grab a second dry one and keep going with no down time.
This product can be used in combination with any of the drying towels above to help minimize water spots and enhance protection while drying a vehicle. This product can be used on ceramic coated and non-ceramic coated vehicles alike. Use a few light mists per panel while drying.
CS3 is similar to Ceramic Waterless above, but it has even more protection and shine built into it. CS3 provides the Clean aspect of Ceramic Waterless, the Shine aspect of Detail Spray or Brilliant Glaze, and the Protect aspect of Ceramic Boost all in one product. Safe for use on paint, glass, and chrome while drying.
Detail Spray is our original drying aid. It works nearly effortlessly to extend the protection on your vehicle. Lightly mist Detail Spray around the whole wet vehicle, then follow with one of our drying towels. It wipes away streak-free and gives excellent gloss and depth in the process.
Waterless Wash can also be used as a drying aid, if you simply want to assist with removing any streaking or water spots without adding any protection in the process. Hitting a few key drip areas with Waterless Wash and a blue Waffle Weave Waterless Wash Towel is a great follow-up after you finish drying the majority of the vehicle.
For a garage queen show vehicle or a ceramic coated vehicle, you may want the safest drying option possible by using a larger forced air blower like the Adam’s Air Cannon or the Master Blaster Revolution. Both of these tools are designed to fully dry a vehicle with very minimal to no touching of the surface.
You may have to use a mist or two of CS3 or Ceramic Boost to wipe away a few water spots in some minor areas afterwards, but these dryers can usually dry 95% or more of the exterior of most vehicles, without the need of a drying aid. Below is a comparison chart with each of our forced air drying tools and a summary of each:
The Adam’s Air Cannon provides powerful amounts of filtered and heated air onto your vehicle, to dry it quickly and safely. This compact blower can be wall mounted with a mount sold separately, but it maneuvers around easily as well with locking wheels. The hose stores compact but self-expands to 30 feet once the machine is powered on, and retracts when powered off. The hose has a twist and lock design so that it will not separate during use, and it also has a foam grip area to protect your hand since it does get fairly warm. The airflow dial can be turned down low to blow out interior vents or high to dry off your full vehicle quickly.
The Adam’s Air Cannon Jr. provides powerful amounts of filtered and heated air onto your vehicle, to dry it quickly and safely. This compact blower can be wall mounted with a mount sold separately, but it maneuvers around easily as well with locking wheels. The hose stores compact but self-expands to 16.5 feet once the machine is powered on, and retracts when powered off. The hose has a twist and lock design so that it will not separate during use, and it also has a foam grip area to protect your hand since it does get fairly warm. The airflow dial can be turned down low to blow out interior vents or high to dry off your full vehicle quickly.
The Blaster Sidekick isn’t intended to dry a full vehicle, but where it really shines is drying hard to reach areas. Its very small and lightweight design allows you to blow powerful forced air into tight areas like behind mirrors, door handles, headlight and tail light surrounds, wheels, and grilles, where water will usually pool up and continue dripping out even a few hours after drying your vehicle. The Sidekick is an affordable blower that you will find yourself using every wash if you don’t have the budget or space for one of the larger machines.
The Master Blaster Revolution is the strongest forced air blower that we offer. It features two 4-horsepower blower motors of filtered, heated air. Two toggle switches allow you to use both motors or run the machine with only one of the two motors. Much like the Air Cannon, this machine does draw considerable power, so you will need an outlet from a 20amp circuit breaker to run it. It comes with a 30 foot fixed-length hose and a wall mount for the machine, so that you can dry all around your vehicle in the garage without having to move the machine around.
Now that we’ve gone through each preparation stage for washing and explained the capabilities and purpose of each product, we’re now finally ready to gather all of the necessary products and begin the wash process.
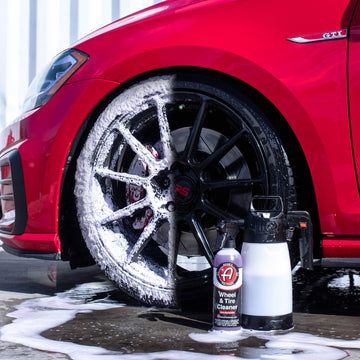
We always recommend that you wash wheels and tires first. This might sound a little odd to some of you reading this, but the reason is so that there is a minimal amount of time when water is sitting on the paint and glass. If you clean wheels and tires last after rinsing off the soap, water is then sitting on the vehicle surface the whole time you are cleaning all four wheels, and possibly baking into the surface from the hot sun.
One other potential issue of washing wheels and tires last is that you may reintroduce brake dust, dirt, gravel particles, and mud back onto the fender arches and rear quarter panels that you just cleaned, causing duplication of effort. Cleaning the wheels, tires, and fender wells at the beginning of the wash will avoid this potential issue.
For the purpose of this blog, we will already assume that the wheels and tires have been washed first, following the process in the Wheel & Tire Cleaning Blog Here.
Wheels should always be cool to the touch before washing them. Wheels, brakes, rotors, etc. get extremely hot, even after a quick drive to the store and back. The heat can adversely affect use of chemicals like Wheel Cleaner, Eco Wheel Cleaner and Wheel and Tire Cleaner, causing potential staining and other problems. Never pull a car into the driveway and start cleaning right away!
With the wheels, tires, and fender wells taken care of, we next move onto cleaning the exhaust tips and engine bay, if necessary. These are two more areas that you should wash before the rest of the vehicle, again to avoid standing water on other surfaces later on. For exhaust tips, first make sure they are cool to the touch, then you can spray them down generously with All Purpose Cleaner or Eco All Purpose Cleaner. The Large or Small Wheel Woolies are great for cleaning the outer portion of the exhaust tip, as well as the inside if it is a dual-wall polished tip like many modern vehicles now come with standard. Once the exhaust tips have been cleaned, thoroughly rinse with water. All of the carbon build-up on the inside wall of the exhaust tip may not come loose from just washing. You may need to use our Metal Polish #1 or Metal Polish #2 to finish detailing the exhaust tips once the rest of the vehicle has been washed and dried.
Before you start washing the vehicle, there are two general rules to remember. Whenever possible: 1) rinse the shade side first, and 2) wash the sunny side first. Doing so prevents water from sitting on paint for extended periods, and blankets the paint in pH neutral soap for the longest amount of time, all meant to help reduce the chance of water spots, etching, etc. Morning and evening washes are also recommended to avoid the hottest times of the day.
We’re now ready to wash the body panels and glass. Thoroughly rinse the vehicle, then foam it if you are going to use a Foam Cannon or Foam Gun setup. Allow the foam to loosen the dirt for a few minutes, then you have two options: You can take your sudsy wash pad/mitt and begin the wash the vehicle, or you can rinse the foam completely, foam it down a second time if you have any remaining solution in your container, and then begin to use a wash pad. This rinse and second foam is optional, but if you’re trying to be as careful as possible when washing, it would be recommended, since the first layer of foam is going to loosen some dirt - the less you have to touch the vehicle with a wash pad/mitt, the less chance of any possible damage.
Once you have your wash pad/mitt loaded up with soap, start on the sunny side of the vehicle. You will want to proceed with a top-down approach - starting at the roof and working downward on the vehicle, leaving the rear of the vehicle, rocker panels, and lower bumpers as the last areas you will clean, since they will usually be the dirtiest areas. After doing a few passes over the roof, you will see dirt build-up in the wash pad or wash mitt. Flip the mitt over and do a few more passes with the other side, then scrub it out in your Rinse Bucket to ensure that you do not drag dirt across the vehicle during the wash. Depending on how dirty the vehicle is, you might be scrubbing it on the Grit Guard every panel or every half-panel. This does add more time to washing, but the goal is to not create any swirl marks, so the safety reassurance is worth the extra time.
After washing all areas, rinse the vehicle very thoroughly - again, start by rinsing any shaded areas first, then any areas in direct sunlight. This ensures that standing water will be on those sunny areas for as little time as possible. If you are able to do so, move the vehicle into the shade or into the garage to dry the vehicle. If using the Air Cannon or Master Blaster Revolution to dry your vehicle, check the area surrounding the vehicle that the blower hose will not get caught on anything, and check for any loose papers, towels, etc, since the strong force of air can easily blow things around in the garage. Start by drying the roof and work your way down. Lift your wiper blades up if possible, then blow the water downward or to the side on the windshield and hood. Dry inside of the mirrors before drying the doors, so that you do not have to dry the doors twice. Open the doors, hood, and trunk to dry the door jambs and water channels.
If drying with any of our drying towels, fold the towel in half or quarters, lightly mist a drying aid if you wish (explained earlier in this blog), and then begin to dry the vehicle by pulling the towel gently across the surface. Start with the windshield or rear glass first to get some water in the towel and soften it up, then start from the roof and work your way down. The Mini Plush Drying Towel or Waterless Wash Towel work great to finish up door jambs and inside of the engine bay and trunk. Now sit back and enjoy the finished result, or head out for a drive in your nice clean ride!
We hope you have enjoyed reading this blog and learned a thing or two along the way! What follows below is a final item checklist and quick step by step summary of the washing and drying process explained above:
In this blog, we explained the wash process, and the preparation steps to consider beforehand to be safe and efficient during the wash itself. We went over our various soaps and drying towels, explaining why we have multiple options and how they work. If you are uncertain about any product or process, or have any questions in general, feel free to contact us at tips@adamspolishes.com, or reach us on our online communities on Adamsforums.com, Instagram and Facebook!
Extra Notes:
If you don’t instill the correct routine of washing, you’ll be polishing your car more frequently and in turn, removing more and more clear coat over time. Washing and drying properly is the #1 thing you should be obsessed over. It’s one of the most frequent detail steps you’ll perform on your car. And it’s incredibly important to preserve the life of your paint. Machine polishing and ceramic coating can be accomplished in a weekend, but the majority of your time will be spent washing and drying, and proper technique is vital to making and keeping your car in its best condition for years to come.


