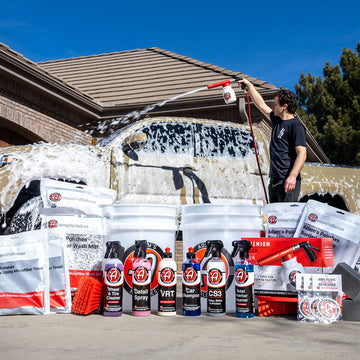
As winter draws nearer, now is the perfect time to prepare your vehicles for harsh weather and driving conditions that many of our customers deal with yearly. Colder temperatures combined with more difficult driving conditions require aids such as magnesium chloride, salt, ash, and even very small pieces of gravel to maintain traction and safer driving on snow and ice. While these traction aids allow you to drive through dangerous conditions in a safer manner, they can cause damage to paint and other surfaces on your vehicle if they are not removed fast enough. Snow, ice, and mud can also impair vision out of the windshield or reduce the performance of your headlights, leading to unsafe driving conditions. It’s important to protect the various surfaces of your vehicle so that these harsh chemicals and traction aids stick to surfaces less, are easier to clean off, and have less chance of causing permanent damage.
In this quick writeup, we’ll cover the main areas that you should address to prepare your vehicle for the winter months, starting with wheels, tires, and fender wells, then moving onto the engine bay and exhaust tips, the major body areas of paint, glass, headlights, and trim, and then ending with interior all-weather floor mats. We recommend this order so that the painted body panels are cleaned towards the end of the cleaning process, which reduces the chance of water spotting. If you were to wash the vehicle body first and then move onto the wheels, tires, engine bay, and so on, this leaves standing water on the body panels, which can lead to water spots.
Winter Preparation & Protection
Pst... Not in the mood for reading? Scroll down to watch the video!
Introduction
Wheels, Tires, & Fender Wells
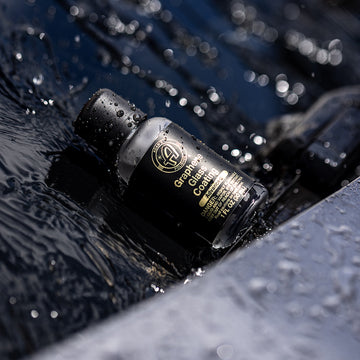
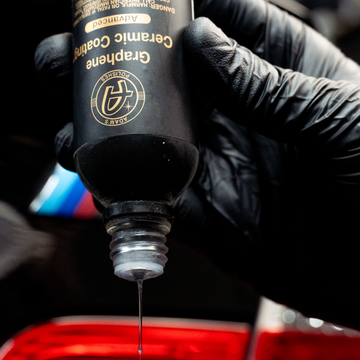
Salt, ash, magnesium chloride, and other materials used to treat roads in the winter months can wreak havoc on certain wheel finishes. If not cleaned often, aluminum wheels can experience oxidation and even corrosion, gloss black and matte black wheels may develop stains or a chalky look, and chrome wheels may experience discoloration and possibly even flaking off of the chrome plating. Whether you have custom aftermarket wheels or factory wheels, you want them to look their best for a long time to come, so adding a durable coating to them is an excellent choice. We recommend our Graphene Ceramic Spray Coating™ for ease of use and durability that will last throughout the winter season.
Tools/Products Needed:
- Floor jack, jack stands, and appropriate tire wrench
- Hose and water
- Adam’s Wheel & Tire Cleaner, Angled Wheel Brush, and Rubberized Tire Brush
- Adam’s Mini Plush Drying Towel, Surface Prep, and Borderless Grey Towel
- Adam’s Graphene Ceramic Spray Coating™, Grey Microfiber Applicator, and Borderless Grey Towel
- Adam’s Graphene Tire Dressing and Pro Tire Hex Grip Applicator
- Adam’s All Purpose Cleaner and Fender Brush
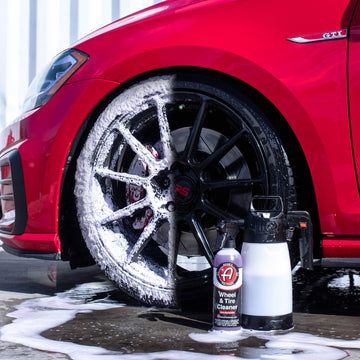
Before starting, check your tire pressures and tread wear! As temperatures drop, so does the air pressure in most tires. Filling them to the proper level will ensure proper traction and even wear. If you have the time, remove the wheel using a proper floor jack and jack stands for safety, and then thoroughly clean the entire wheel of all dirt, brake dust, and contamination - outer spokes, lip, and inner barrel. If you cannot remove the wheel, the Angled Wheel Brush will still usually allow you to clean the entire barrel on most wheels, though you may have to move the vehicle forward or backward two feet if it has large rotors and calipers that block a portion of the wheel barrel. Wheel & Tire Cleaner with the Angled Wheel Brush is an excellent combo for a deep-clean of most wheel finishes.
Clean the tire now as well, using the same chemical with our Rubberized Tire Brush - clean the tire once, rinse, then clean it a second time to ensure all previous dressings and tire blooming discoloration are removed. Once you have rinsed and dried the wheel and tire (the Adam’s Mini Plush Drying Towel is a great option), use Surface Prep and a clean Borderless Grey Towel to fully wipe all areas of the wheel, then apply Graphene Ceramic Spray Coating™ evenly to all areas of the wheel with a Grey Microfiber Applicator. Allow it to flash for 2-3 minutes or so, and then buff away the residue with a second clean Borderless Grey Towel. After wiping away the coating residue, let the wheel cure for another 6 hours before exposing it to any water or moisture. Adam’s Graphene Tire Dressing with a Pro Tire Hex Grip Applicator is an excellent choice to protect and darken tires for several weeks per application using minimal effort.
If you removed the wheel from the vehicle, now is the perfect opportunity to do a deep scrub of the inner fender well, brake, and suspension components. Generously spray Adam’s All Purpose Cleaner onto the fender liner, brake caliper, and any easy-to-reach suspension components (strut, spring, etc), then use the Fender Brush to scrub and clean all of these areas. Very thoroughly rinse all areas with a strong stream of water from the hose. If the vehicle has carpeted fender liners, a pressure washer will be more effective to rinse all of the APC suds from the liner and remove as much dirt as possible. If your vehicle has plastic fender liners though, you should protect them now while the wheel is off, so that dirt, mud, salt, magnesium chloride, and other contamination will be easier to clean off afterward.
Graphene Ceramic Spray Coating™ is suitable and recommended for plastic fender liners, and you would apply it in a similar manner as when you coated the wheel - use Surface Prep first, then mist the spray coating into the fender liner, spread with a Grey Microfiber Applicator, and wipe away with a plush Borderless Grey Towel. Make sure to coat the edge of the fender liner where it meets the painted fender, since excessive salt buildup in these areas can eventually lead to clear coat failure and rust. Lastly, if your vehicle has painted or powder coated brake calipers, make sure to coat them with Graphene Ceramic Spray Coating™ as well to make brake dust much easier to clean off afterward. Re-install the wheel and tire back onto the vehicle, then repeat all of these steps for the other three wheels.
Engine Bay & Exhaust Tips
Next we’ll move onto cleaning and protecting two other high-dirt areas on a vehicle - the engine bay and exhaust tips - before moving onto exterior paint, glass, and trim. There are a few important things you should check before you begin to clean the engine bay and prepare to protect various components:
1. Check and top off all fluids if they are low. Check the windshield wiper fluid, coolant, engine oil, transmission fluid, brake fluid, and so on to make sure that none are low to let the vehicle perform its best throughout the winter months. Filling up low fluid reservoirs before you start any cleaning is smart, because if you have any spills, you won’t have to clean areas a second time.
2. Remove any and all leaves, tree needles, and other debris from the wiper cowl, fender rails, and any other areas that may have drain holes. Leaves and other debris can plug these drain holes, which will trap water and snow and can lead to rust.
3. Cover any exposed wiring around the battery, as well as any aftermarket open-element cold air intake filters. If the fuse panel has a “No pressure washer” warning, cover this area as well. Plastic grocery bags and tape work well to temporarily cover these areas.
Tools/Products Needed:
- Hose and water or pressure washer
- Adam’s Eco All Purpose Cleaner, Fender Brush, and Trim & Lug Nut Brush
- Adam’s Air Cannon and Mini Plush Drying Towel
- Adam’s VRT, In & Out Spray, and Block Applicator
- Adam’s All Purpose Cleaner, Small Angled Wheel Brush, One Step Metal Polish, Grey Microfiber Applicator, and Borderless Grey Towel
Begin the engine bay cleaning process by using a fine mist stream from your hose, or a 40-degree rinsing tip (white tip) on the pressure washer, to spray down the engine bay evenly, including the underside of the hood - the hood liner will typically hold large amounts of dirt and debris. If using a pressure washer, keep the pressure washer tip 12-18 inches away from the surfaces you are rinsing. Next, generously spray Eco All Purpose Cleaner around the engine bay on hoses, plastics, plastic covers, and so on. Use the Adam’s Fender Brush to gently scrub all large areas of the engine bay, then the Trim & Lug Nut Brush to reach into the tight nooks and crannies. Thoroughly rinse all areas of Eco All Purpose Cleaner using a misting stream from the hose or the same white tip on the pressure washer, and then allow the engine bay to dry or use a Mini Plush Drying Towel on the larger areas. The Adam’s Air Cannon is an optional tool to more effectively dry the engine bay in a short amount of time and effort.
Once all areas are dry, you can then protect the majority of most modern engine bays with two products - Adam’s VRT and In & Out Spray. Pour a few drops of VRT onto a Block Applicator sponge and spread it evenly over large plastic areas, such as radiator shrouds, the wiper cowl, and plastic engine covers. For hard-to-reach areas, rubber hoses, plastic wire loom, and other small plastic and rubber components that are difficult to treat with VRT, our aerosol In & Out Spray will treat these areas in seconds and leave them looking dark with a nice satin finish. Then take a clean Borderless Grey Towel and wipe off any over spray that may have gone onto paint and glass. This quick clean and protect process isn’t necessary at every wash, but we do recommend giving the engine bay a thorough cleaning at every oil change.
Bonus: An optional step for engine bay protection would be to use Graphene Ceramic Spray Coating™ on the painted areas such as fenders and the underside of the hood!
With the engine bay now clean and protected, we’ll move onto the exhaust tips. Soot and dirt can build up on exhaust tips very quickly, so it’s important to clean them often to prevent that soot from baking into the chrome or steel, which makes them much more difficult to clean. First, make sure the exhaust tips are cool to the touch before continuing. Generously spray All Purpose Cleaner onto the exhaust tip, then clean the outer wall with the Small Angled Wheel Brush, as well as the inner wall if it is a polished double-wall exhaust tip. Dry the exhaust tip using the Mini Plush Drying Towel or Air Cannon, then use a Grey Microfiber Applicator and Adam’s One Step Metal Polish to clean and polish the exhaust tip even further to a mirror shine.
If heavy soot is baked onto the exhaust tip, you can use #0000 Super Fine Steel Wool in conjunction with the One Step Metal Polish to more thoroughly clean the metal surface, but keep in mind that the steel wool may leave tiny micro-scratches as it removes the heavy soot buildup. Finally, wipe away the One Step Metal Polish residue with a Borderless Grey Towel. Adam’s One Step Metal Polish has a sealant protectant built into its formula, so it will add a small amount of protection that will make follow-up cleaning more easy.
Paint, Glass, Headlights & Trim
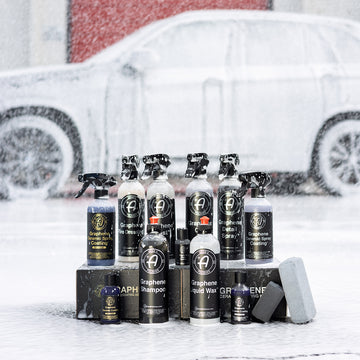
Keeping paint, glass, and exterior trim pieces clean and protected during winter months is very important for many reasons. Vehicles are an expensive investment, so you want them to last as long as possible. Just like road treatment materials like salt and magnesium chloride can damage wheels, they can harm clear coats, paint, chrome, rubber, and plastic if left on these surfaces for too long. Keeping exterior surfaces protected will greatly reduce the chance of things such as clear coat failure, rust, staining, and discoloration; and by having a robust protection like a ceramic coating, contamination will not stick to the various surfaces as much and they will wash off more easily too.
Tools/Products Needed:
- Hose and water
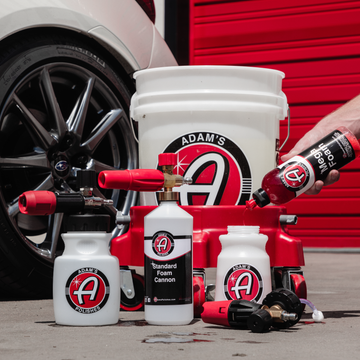
- Adam’s Car Shampoo/Strip Wash, Wash Bucket, Rinse Bucket, Ultra Plush Drying Towel
- Optional: Adam’s Premium Foam Cannon and pressure washer
- Adam’s Clay Mitt and Iron Remover
- Adam’s Glass Cleaner and Green Microfiber Glass Scrubbing Towel
- Adam’s Trim Cleaner, Edgeless Utility Towel, and Deep Clean Eraser
- Adam’s Surface Prep and Borderless Grey Towel
- Adam’s Graphene Ceramic Spray Coating™, Grey Microfiber Applicator, and Borderless Grey Towel
Start by rinsing the vehicle with a steady stream from the hose or pressure washer with appropriate tip (white or green tip). Wash the vehicle with a top-down approach, using the Two Bucket Wash Method (outlined in previous write-ups and videos) with Adam’s Car Shampoo. For a heavier deep cleaning, you can first foam the vehicle down with Strip Wash in a Foam Cannon setup with a pressure washer, then move onto the Two Bucket Wash followed by rinsing the vehicle. If there is heavy contamination on the paint that feels rough, you can re-suds the vehicle with Car Shampoo and then clay the surface using a Clay Mitt with the soap suds as the clay lubricant. This way you are not adding any extra protection on the surface before applying Graphene Ceramic Spray Coating™, to make sure it bonds best. Adam’s Iron Remover can also be used to remove any visible iron deposits, which appear as small orange, rust-like dots in the paint of lighter-colored vehicles. Rinse and dry the vehicle with an Ultra Plush Drying Towel or Adam’s Air Cannon.
Next, clean any plastic or rubber trim such as window seals, the wiper cowl, bumper moldings, etc. Trim Cleaner with an Edgeless Utility Towel works very effectively to deep-clean these areas, then use a second Edgeless Utility Towel to wipe away excess residue. For even heavier cleaning, you can use a Deep Clean Eraser to scrub, but use caution with rubber moldings so that you do not damage the finish. The last areas to clean are the glass and headlights. For the best clarity in winter driving, we recommend cleaning the glass and headlights with Adam’s Glass Cleaner as a lubricant for the Clay Mitt. After claying the glass and headlights, wipe away the residue with an Adam’s Green Microfiber Glass Scrubbing Towel.
You can now move onto using Surface Prep with a Borderless Grey Towel on all of the exterior areas that were just thoroughly cleaned. Surface Prep will remove any trace amounts of soap residue and surfactants from the Trim Cleaner. Lastly, apply Graphene Ceramic Spray Coating™ to these surfaces. If you are still new to using Graphene Ceramic Spray Coating™, coat one or two windows at a time by spraying into the applicator and then wiping it evenly over the glass. Allow it to flash until the rainbow-look begins to disappear, usually 2 or 3 minutes, then wipe away the residue with a Borderless Grey Towel. Once you are more comfortable with the flash times of the spray coating, you can coat larger areas at a time before wiping it away. Coat the windshield as well as the wiper blades. The spray coating causes rain, snow, and slush to repel from your windshield, allowing for better overall visibility when driving in harsh conditions. Then move onto the painted body panels and headlights. As with the wheels, fender liners, and brake calipers, keep water and moisture off of these areas for at least 6 hours for proper curing time.
All Weather Floor Mats
The last area that sees a lot of traffic from salt and magnesium chloride are the all-weather floor mats. Leaving these chemicals on them for too long can discolor them, turning the rubberized black floor mat into a more greyish, dull look. All-weather floor mats are excellent at keeping mud, snow, slush, salt, and other dirt from getting into and staining the carpet underneath, but you will need to clean them often throughout the winter season. Graphene Ceramic Spray Coating™ can also be used in this instance to make the floor mats much easier to clean up. When it is applied properly, the mats will retain their traction and will not be slippery or dangerous like if you would use our VRT or In & Out Spray, which we do not recommend.
Tools/Products Needed:
- Hose and water
- Adam’s Rubber Mat & Liner Cleaner, Rubberized Tire Brush, and Mini Plush Drying Towel/Air Cannon
- Adam’s Surface Prep and Edgeless Utility Towel
- Adam’s Graphene Ceramic Spray Coating™ and Grey Microfiber Applicator
The process to prep and protect all-weather floor mats is very easy. Remove the mat from the vehicle and blow off or vacuum any loose debris. Saturate the mat with Adam’s Rubber Mat & Liner Cleaner, allow it to soak for 20-30 seconds, then scrub it with the Rubberized Tire Brush. Thoroughly rinse with a hose and water or pressure washer, then dry the mat with a Mini Plush Drying Towel or Air Cannon. Wipe the all-weather floor mat with Surface Prep and an Edgeless Utility Towel until dry. Mist an even layer of Graphene Ceramic Spray Coating™ over the entire top portion of the mat, spread it evenly with a Grey Microfiber Applicator, and allow it to dry. You can use the Edgeless Utility Towel to wipe up any excessive spray coating that may pool up in some of the channels and crevices found in some mats.
Summary
In this blog, we went through our recommendations for winter preparation on your vehicle, most importantly to keep it safe but also protected from harsh environments and chemical road treatments. We showed how Graphene Ceramic Spray Coating™ can be used on virtually every exterior surface to provide durable protection through the winter months, to keep snow and ice from sticking as easily, and to clean mud and dirt from the body and glass in a much easier manner. If you are uncertain about any product or process, or have any questions in general, feel free to contact us at orders@adamspolishes.com, or reach us on our online communities on Adamsforums.com, Instagram and Facebook, as well.


