With the wheels and tires now clean, you may want to move onto washing the rest of th exterior of the vehicle, but not quite yet! Now is the perfect time to look over the engine bay to see if it needs a quick cleaning, before you spray water onto the rest of the car. You will want to clean the engine bay and exhaust tips next to avoid the chance of annoying water spots forming on the paint and glass if you were to wait until the end of the wash process to clean these areas. Again the main goal is to have standing water on the outside of the vehicle for as little time as possible.
Lifting the hood to find a clean engine bay is a very rewarding feeling, and shows others that you take pride in your ride; however, many owners are very hesitant to do anything at all with the engine when it comes to cleaning, for fear of damaging something, setting off warning lights on the dashboard, or worse. Others may say that you should never use a pressure washer on your engine bay, but we're here to tell you that if you use the right process with a pressure washer, it will actually put much less water on the engine in a much wider fan pattern than a garden hose.
Before you start, make sure the engine bay has cooled off. Just like with wheels and brakes, you do not want to spray water or chemical onto a hot engine bay. Next, make sure you have the correct spray tip inserted into your pressure washer wand or snub nose handle. The white 40-degree tip is going to be the safest, since it will create the widest fan spray of water. Gather the same wheel brushes that you used to clean the face and barrel of your wheels - they work perfect for cleaning the engine compartment as well. Lastly, you'll need just two chemicals - Adam's Tire & Rubber Cleaner and Adam's Interior Detailer...we'll explain that one below! The last prep-step is to cover up any exposed open-element or aftermarket air filters and any exposed wiring. You can use a plastic bag or aluminum foil as Adam mentions in the video. If the fuse panel or computer has a "No Pressure Washer" warning symbol on it, make sure to cover that area as well, and if the alternator sits up high on the engine, you may want to cover it as well.
Begin cleaning the engine bay by doing a quick rinse with the pressure washer, working top-down. In the video, Adam holds the hood of this GMC Yukon Denali, pulled down slightly as he sprays the underside of the hood, in order to reduce the amount of water that oversprays onto the windshield and front fenders. Quickly rinse various engine components to loosen heavy dirt, grease, and debris, making sure to hold the pressure washer wand or snub nose handle about 12-18" away from the surfaces that you are cleaning. For cleaning tools, we'll use some of the same brushes that we used to clean the wheels, such as the Fender Brush, Rubberized Boar's Hair Wheel Face Brush, and the Rubberized Trim & Lug Nut Brush, along with our Tire & Rubber Cleaner. Generously spray Tire & Rubber Cleaner over the various engine bay components, then gently scrub each area with the appropriate brush. Tire & Rubber Cleaner is very effective because it leaves plastics clean with a darker look.
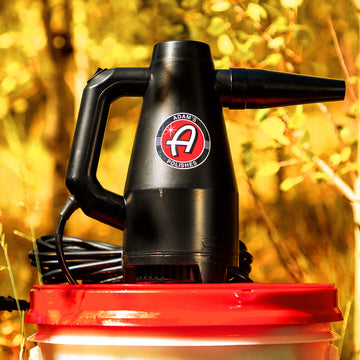
Use the delicate Boar's Hair brush on painted areas such as the inner fenders and the underside of the hood, the Fender Brush to clean big areas or hard-to-reach spots up near the firewall, and the Trim & Lug Nut Brush to access intricate or small areas such as around brackets, wire loom, bolts, and more. Next, rinse everything from the top-down again to remove all dirt and chemical residue. Then we move onto drying with the Air Cannon. Using a forced air blower will quickly dry the engine compartment and ensure that you remove any traces of water from sensors, wires, plugs, and any other areas that you do not want to leave standing water. Lastly, Adam finishes up by spraying our Interior Detailer in wide mists around the entire engine compartment. Interior Detailer works excellent here as a dressing for plastics and hoses, leaving them with a fresh, showroom new look, and because it is water-based, it will self-level almost perfectly. Close the hood, move on with the rest of the detail, and then check the engine a few hours later to see if you need to use a Foam Block Applicator to level any streaks.
You now have a freshly clean and dressed engine bay, in as little as 10-15 minutes from start to finish. This is a very quick and easy process that you shouldn't be afraid to do on nearly every modern vehicle. Clean the engine bay every 3 or 4 washes to keep it looking fantastic all year round!
