Graphene Ceramic Coating™
Explained

Introduction to Graphene

Since releasing our Graphene Ceramic Coating™ in July of 2020, we have received hundreds of questions and comments through social media, forum, Facebook community, emails, and chats, in regard to it and our follow-up products in our graphene line of products. Our Graphene Ceramic Coatings are an evolution of our traditional quartz (SiO2) based ceramic coating offerings. We are very proud to offer this technology - we have received a large amount of positive feedback and reviews on how our Graphene Ceramic Coating and other reduced graphene oxide infused products perform, their ease of application, and the wow-factor of the finished result on the vehicle. There are some misconceptions too, which we have done our best to address and explain in videos and articles, and through questions and answers across various platforms like social media live feeds, show event demonstrations, clinics, and so on. This write-up will serve to address the what’s, why’s, and how’s about our graphene products.

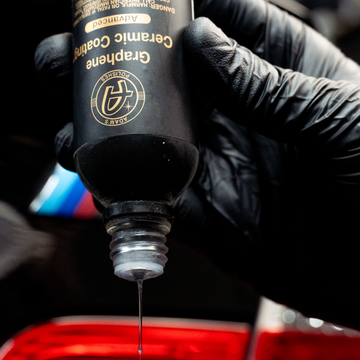
We have introduced Advanced versions of our Graphene Ceramic Coating™ and Graphene Ceramic Spray Coating™. Graphene Ceramic Coating™ Advanced and Graphene Ceramic Spray Coating™ Advanced as their names imply, are further enhanced versions of our Graphene Ceramic Coating™ options, with even more durability due to being thicker formulas. Our advanced graphene coatings have 50% increased active resin content compared to their regular versions, meaning they leave a thicker layer of protection on the surface, with an even higher contact angle for water-repellency, less chance of water-spotting, and slicker feel.

Graphene Ceramic Coating™ Advanced and Graphene Ceramic Spray Coating™ Advanced are still easy to work with overall, and they follow the same application processes outlined later in this write-up; however they do require a little more effort and care in the application and removal process, so that is why we consider them advanced formulas. They can provide upwards of 9 years or 18-24 months of protection on your vehicle’s many exterior surfaces, depending on which option you choose. To learn more about Graphene Ceramic Coating™ Advanced and Graphene Ceramic Spray Coating™ Advanced, and how they differ from their regular versions, click here to read our separate article: Understanding Graphene Ceramic vs.
Graphene Ceramic Coating Advanced

What is reduced graphene oxide?

Minutes after unveiling our Graphene Ceramic Coating and Graphene Ceramic Spray Coating on social media, there were comments discrediting them: ‘You can’t make a raw graphene coating!’ ‘Why would you call it graphene and ceramic? It can’t be both.’ ‘Graphene is snake oil and has no benefit. It’s all marketing.’ Since its launch, we have been as transparent as possible when explaining our Graphene Ceramic Coating. Our Graphene Ceramic Coating is not raw graphene, that quote above is correct - it cannot be raw graphene that is one atom thick and be a liquid form at the same time.

Reduced Graphene Oxide is a derivative of Graphene. From one of our chemists, Graphene - a monolayer of graphite - is able to be processed into graphene-oxide (GO), which makes the material vastly easier to process and formulate around. Our chemists then used this technology to allow a Reduced Graphene Oxide matrix to modify the ceramic coating backbone, enhancing the performance on a surface even further by using the bonding characteristics of the ceramic coating. Our Graphene Ceramic Coating improves upon the characteristics of our UV Ceramic Paint Coating and UV Ceramic Wheel Coating options by offering greater hydrophobic behavior, additional resistance to chemicals, more gloss and slickness, ease of application, and more durability to scratching and marring. This is not to say though, that the coating is impervious to scratching or marring. We’ll discuss these improvements more in-depth below.

Longer lasting protection for your vehicle.

Why is reduced graphene oxide better?

Hydrophobic Properties
Modifying our ceramic coatings with the technology of reduced graphene oxide provides many benefits for our customers and their vehicles. The first improvement we mentioned above is enhanced hydrophobic behavior, which is best described as a dynamic hydrophobicity. The contact angle was marginally improved; however, the sliding angle of the coating was dramatically lowered. Contact angle in this application, is the angle at which a liquid (deionized water) meets a solid surface (coating applied to a clear coated body panel). In other words, a lower contact angle will have a wide water droplet that appears more like an oval on the surface, and a higher contact angle will have a more spherical droplet, with less of its circumference contacting the surface. Having a much lowered sliding angle means the degree of tilt is much less for water movement on a surface. This has a big impact on the effectiveness of a primary attribute of the coating, the self-cleaning factor. What do we mean by self-cleaning? Water, and even dirt particles to a degree, will roll off the surface more dramatically than our other coating options.

Durability
The addition of reduced graphene oxide provides more durability to the ceramic coating as well. In testing inside and outside of the lab, the reduced graphene oxide infused coating offered higher tensile strength, yielding more scratch and mar resistance. This in turn increased resistance to water spot etching and detergent washes – standing up to hundreds of traditional car washes or thousands of scrubs on an abrasion-washability tester, with little to no wear on the properly applied and cured coating. Our Graphene Ceramic Coating was also certified at a greater than 10H hardness rating by an independent testing company. What this means is that the coating withstood scratching from a pencil with a hardness rating of 10H.

Previously, 9H was the hardest grade of pencil, so when a ceramic coating is rated at a 9H hardness rating, this means that a 9H pencil does not leave a mark when firmly pressed into the surface at a 45-degree angle. Even if the graphite of the pencil breaks, if it does not leave a mark on the surface, then it is still rated at that particular hardness level. 10H pencils are now available, so we had our Graphene Ceramic Coating recertified to a 10H level. Having a higher hardness rating means that it will be slightly more resistant to etching from bird droppings or scratching from particles in a wash mitt or drying towel, which is always a good thing, but we are in no way saying that the coating is scratch-resistant - it can and will scratch or mar if subjected to sharp or abrasive forces like rocks, sand paper, and so on.

Gloss and Slickness
Both of our graphene coating offerings, Graphene Ceramic Coating and Graphene Ceramic Spray Coating, also have a more slick feel and produce a higher level of gloss to clear coated surfaces. The coating film is thicker due to a higher overall activity level in the formula when compared to our quartz (SiO2) coatings – some of our highest actives in a coating yet, other than the Pro-Level coatings offered exclusively to detailers that complete our Shine Academy educational course. Despite the higher active level, the graphene coatings don’t have as harsh of an odor as the UV Paint and UV Wheel Coating, while still being easy to apply as well, which is covered in the next section of this blog. Having said that, you still DO NOT want to smell the coatings - there is a reason they come with child-proof caps, unlike most of our other chemicals that have pleasant scents.

Is it difficult to apply Graphene Ceramic Coating™?

Applying Adam’s Graphene Ceramic Coating™ and Adam’s Graphene Ceramic Spray Coating™ are similar in application to what you’d expect from our other ceramic coatings, with a few key differences. The graphene offerings tend to flash and cure more rapidly, particularly in hot and humid climates, so they may be found to be a little less user friendly in this aspect; however most of our customers have commented that the overall application and removal process is fairly easy and forgiving when compared to some other coatings they have worked with. In environments with very low humidity though, we have found that the Graphene Ceramic Coating can flash on the surface longer than we would normally allow it, and it can still wipe away without too much effort.

Finding the sweet-spot when the coating has not flashed for too long or too little for your environment is one of the main keys for easy application. To explain this sweet-spot time frame, after you apply the coating evenly to the surface, it will begin to have an oily, rainbow-like appearance sometimes in as little as 20 or 30 seconds. This doesn’t necessarily mean that you

can remove it as soon as you see the rainbow though. You will want to wait until the coating has a slightly tacky feel to it, where your microfiber towel will have a small amount of tension as you wipe the flashed coating away. This could take 1 minute or 5 minutes or more depending on the temperature and humidity in your garage. A second way to tell when the coating has flashed and is ready for removal is when the rainbow coloration begins to fade and turn to a clear appearance. This is usually the point when the coating will have some tension when wiping it away, but again, temperature and humidity may not mean this is the case every time. On certain colors of paint, the rainbow effect can be very difficult to see as well, so ultimately it comes down to towel feel when wiping it away. Lastly, if you let the coating sit for too long though, it can become very difficult to remove, and can leave streaks, overlap lines, etc. which you will then have to fix, which we will explain below.

Multi-Surface and UV Glow
One special characteristic we found in development of the graphene coatings is they have a strong compatibility with almost any external automotive surface. Adam's Graphene Ceramic Coating™ and Adam’s Graphene Ceramic Spray Coating™ are defined as multi-surface coatings because they are appropriate for many different substrates - paint, wheels, plastic trim, chrome, glass, rubber, or metal. This provides additional ease of use since you are able to coat more surfaces on a vehicle using one coating. Our chemists were also able to incorporate our patent-pending UV Ceramic Glow Technology™ into the new graphene coatings. Just like our UV Paint, UV Wheel, and UV Leather & Interior coatings, this UV glow tracer when combined with the UV LED Light aids in the application of the coatings by providing visual confirmation of the coating film post-cure. Inspecting the UV glow ensures high spots are leveled properly and all surface areas are properly coated.


Preparation & Application Instructions

Process
Applying Adam’s Graphene Ceramic Coating or Adam’s Graphene Ceramic Spray Coating is a straightforward process; however, the more preparation effort that you put in, the better they will work and the longer they will last. In order to reach longevity of 12 months for the spray coating or several years for the full coating in the 60ml bottle, they must be applied to a completely clean surface, free of dirt, oxidation, and any other protection, dressings, or other products that may have been previously applied to a surface. These would include but are not limited to waxes, sealants, soaps with any protection, spray detailers or maintenance products like Detail Spray or Ceramic Boost, plastic and rubber treatment products like VRT, and so on. Outlined below are the prep and application steps required for various surfaces:

Preparation Instructions

  1. Thoroughly wash the vehicle using a shampoo without any protection additives like Adam’s Car Shampoo or Mega Foam, or through a Waterless Wash or Rinseless Wash process.
    a. Use a Foam Cannon or Foam Gun if possible, as well as a Two Bucket Wash Method with Grit Guards.
    b. Use multiple clean towels if performing a Waterless or Rinseless Wash.
    c. The safer you are in the wash process, the less chance of wash-induced marring or scratching.

  2. (Optional) Perform iron decontamination with Iron Remover if necessary, by referencing our videos and other blog write-ups.

  3. Thoroughly rinse and dry the vehicle with an Ultra Plush Drying Towel or Air Cannon.

  4. Mask off any plastic and rubber areas that come in contact with paint, using detailing tape or painter’s tape.

  5. Remove bonded contamination with a Clay Bar or Clay Mitt using Detail Spray as a lubricant.

  6. Wipe away clay residue with a clean microfiber towel and Surface Prep.

  7. Perform paint correction with a machine polisher by referencing our videos and other blog write-ups.
    a. Remove previous protection with Compound and a Microfiber Cutting Pad.
    b. Remove oxidation, swirl marks, light scratches and other imperfections using various stages of Compound and Polish with their respective pads.
    c. Always do a test area first. Every vehicle will need a different level of correction.
    d. The better you make the surface look in compounding and polishing, the better the graphene ceramic coating will look in the end. Coatings do not fill in or hide swirl marks and other imperfections.

  8. Wipe away Compound and Polish residue with a clean microfiber towel.

  9. Move the vehicle indoors if you have not already done so for claying/compounding/polishing. Remove any Compound and Polish dust from body panels, body seams, etc. using a clean microfiber towel and Surface Prep.

  1. Clean exterior glass using Adam’s Glass Cleaner and Green Microfiber Glass Scrubbing Towel.
  2. Clay glass with a clay bar or clay mitt using Glass Cleaner as the clay lubricant.
  3. (Optional) Polish the glass with our white Polish or Hand Polish with a Blue Hex Grip Applicator. Wipe away residue with a clean microfiber towel.
  4. Use a second clean Glass Towel with Surface Prep to ensure the glass is 100% clean.

NOTE: If you are coating a set of new wheels, we strongly recommend coating the wheels after the tires have been mounted and balanced. Wheel weights can have difficulty sticking and can fall off if you coat the wheels before mounting and balancing the tires.

  1. If you wish to coat the outer and inner portions of the wheel, carefully remove the wheel from the vehicle after lifting the vehicle and securing it with jack stands.
  2. Heavy brake dust: Thoroughly clean the wheels using Adam’s Wheel Cleaner or Adam’s Wheel & Tire Cleaner, with the Short Wheel Brush, Trim & Lug Nut Brush, and Wheel Woolie for the inner barrel.
  3. Light brake dust or light dirt: Thoroughly clean the wheels using a shampoo without any protection additives like Adam’s Car Shampoo or Mega Foam or Adam’s Eco Wheel Cleaner with the Short Wheel Brush, Trim & Lug Nut Brush, and Wheel Woolie for the inner barrel.
  4. Thoroughly rinse the brushes or scrub them on a Grit Guard in a wash bucket multiple times throughout the cleaning process as they become dirty. You do not want to continue scrubbing dirt into other parts of the wheels and possibly scratching them.
  5. Thoroughly rinse and dry the wheels with a Mini Plush Drying Towel, Air Cannon, or Blaster Sidekick.
  6. (Optional) On clear coated, chrome, or gloss powder coated wheels, remove bonded contamination with a Clay Bar or Clay Mitt using Detail Spray as a lubricant.
    a. Wipe away clay residue with a clean microfiber towel and Surface Prep.
    b. Perform paint correction with the Swirl Killer Mini or Swirl Killer Micro Polisher by referencing our videos and other blog write-ups.
    c. Remove previous protection with Compound and a Blue Foam Pad.
    d. Remove oxidation, swirl marks, light scratches and other imperfections using various stages of Compound and Polish with their respective pads, or Metal Polish for chrome wheels.
    e. Always do a test area first. Every wheel will need a different level of correction.
    f. The better you make the surface look in compounding and polishing, the better the graphene ceramic coating will look in the end. Coatings do not fill in or hide swirl marks and other imperfections.
    g. Wipe away Compound/Polish/Metal Polish residue with a clean microfiber towel.
  7. Use a clean microfiber towel with Surface Prep to ensure the wheel is 100% clean.
  1. Remove any detailing tape or painter’s tape from the plastic and rubber trim.
  2. Clean exterior plastic trim and rubber using Adam’s Trim Cleaner or Tire & Rubber Cleaner with an Edgeless Utility Towel.
    a. Fold the towel into fourths. Spray the cleaner directly into the towel, not onto the surface, to avoid over spray onto surrounding paint and glass areas that may have already been cleaned/polished/prepped.
    b. Use one side of the towel to scrub away dirt, oxidation, and previous dressings. Use a dry side of the towel to wipe away excess residue.
    c. (Optional) Use a Deep Clean Eraser in place of the Edgeless Utility Towel for very heavy cleaning. Test first to ensure the eraser does not scratch soft plastic.
    d. Clean the plastic until you no longer see new dirt/discoloration in the towel.
  3. If there are white/chalky wax or sealant stains in plastic trim, you may need to repeat the above cleaning steps multiple times before all discoloration is removed.
    a. You do not want to coat over any stains or discoloration in plastic.
    b. The coating will not hide the stains, and then they would be locked in underneath the coating.
  4. Use a second clean Edgeless Utility Towel and generously clean the area with Surface Prep to ensure all Trim Cleaner or Tire & Rubber Cleaner has been removed.

Application Instructions

NOTE: Rubber gloves are strongly recommended for applying a ceramic coating, and a pair are included with the Graphene Ceramic Coating Kit.

  1. Move the vehicle (or wheels if coating wheels only) indoors into a garage.
    a. This minimizes dust and moisture exposure, as well as provides a more consistent temperature.

    b. Use multiple light sources at various angles to work more effectively and see the coating flashing more easily on lighter colored finishes.
  2. Generously wipe the surface with Surface Prep and a Borderless Grey Towel. The Surface Prep will evaporate to a degree while wiping - this is normal.  
  3. Thoroughly shake the Graphene Ceramic Coating 60ml bottle or the Graphene Ceramic Spray Coating 12oz bottle to mix the solution evenly.
  4. Graphene Ceramic Coating: Pour several drops of the coating onto one side of the Suede Applicator Block. Do not use the side that is stitched together. Graphene Ceramic Spray Coating: Facing away from the vehicle, mist 2 or 3 sprays into the Microfiber Applicator Block.
  5. Apply the coating to a panel in an even manner.
    a. We recommend outlining the panel first, then pour/spray a little more into the applicator and fill in the remainder of the panel by applying in overlapping left/right or up/down passes.

    b. Try not to lift the applicator from the surface when applying the coating. Lifting the applicator will expose it to more oxygen and leave heavier spots of coating in those sections, which can possibly become high-spots later on.
    c. If you apply in a left/right path first, then do another pass in an up/down path. You do not need to apply more coating into the applicator at this point - you just want to spread it for more even and complete coverage.
  6. After a few moments, the coating will begin to have an oily, rainbow-like appearance as it begins to flash on the surface.
  7. Once the coating becomes slightly tacky on the surface, gently wipe the coating with a new, clean Suede Microfiber Towel to remove approximately 50% of the coating residue or more. a. The time in which it is ok to remove the coating residue can be anywhere from 30 seconds to 3 minutes or more, depending on temperature and humidity.
    b. If the Suede Microfiber Towel seems to glide very easily without any slight tension, let the coating flash for another 30 seconds and test again.
    c. One other way to verify that the coating is ok to wipe off is when the rainbow effect begins to fade into a more clear look on the surface.
  8. Wait another 20-30 seconds, and then take a new, clean Borderless Grey Towel to thoroughly wipe away all remaining coating residue.
  9. Repeat the above steps for the remaining, body panels, glass, or wheels.
  10. Inspect all areas of the vehicle to ensure all coating residue has been removed.
    a. Use the UV LED Light to inspect coated areas for complete coverage. Some areas may appear to glow more heavily than others. You may see streaking, or overlap lines with the UV Glow Tracer - as long as the coating residue has been fully removed, these inconsistencies that are seen with the UV Glow Tracer will not show up under normal light.

    b. Temporarily move the vehicle outside to inspect it under natural lighting, both sunlight and overcast conditions if possible. No matter how much lighting you have in your garage, you will most likely see a few high-spots that you did not notice indoors. Polarized sunglasses can also aid in spotting high-spots.
    c. To correct any high-spots or other issues, please see the next section of this blog.
    d. Move the vehicle back indoors.
  11. Allow the coating to cure indoors for the required minimum time frame.
    a. Graphene Ceramic Coating: 24 hours

    b. Graphene Ceramic Spray Coating: 4-6 hours or longer if possible
    c. (Optional) Infrared Cure Lamps can be used to speed up the curing process, but are not required.

NOTE: Rubber gloves are strongly recommended for applying a ceramic coating, and a pair are included with the Graphene Ceramic Coating Kit.

  1. Move the vehicle indoors into a garage.
    a. This minimizes dust and moisture exposure, as well as provides a more consistent temperature.

    b. Use multiple light sources at various angles to work more effectively.
  2. Generously wipe the plastic or rubber surface with Surface Prep and an Edgeless Utility Towel. The Surface Prep will evaporate to a degree while wiping - this is normal. If the plastic or rubber trim does not appear to have a uniform color appearance after the Surface Prep is fully dry, go back to the PREP Steps and clean the area again before continuing.
  3. Thoroughly shake the Graphene Ceramic Coating 60ml bottle or the Graphene Ceramic Spray Coating 12oz bottle to mix the solution evenly.
  4. Graphene Ceramic Coating: Pour several drops of the coating onto one side of the Suede Applicator Block. Do not use the side that is stitched together. Graphene Ceramic Spray Coating: Facing away from the vehicle, mist 2 or 3 sprays into the Microfiber Applicator Block.
  5. Apply the coating to the plastic or rubber trim in an even manner.
  6. Use the applicator to level the coating evenly across the rubber or plastic, so that it appears uniform, rather than having some areas heavier or shinier than other areas.
  7. Allow the coating to flash and soak into the surface for 30-60 seconds. It will not rainbow as it does on paint, glass, and chrome.
  8. Use a clean Edgeless Utility Towel to thoroughly wipe the plastic or rubber trim to ensure that all solvent from the coating has been removed.
  9. Allow the coating to cure indoors for the required minimum time frame.
    a. Graphene Ceramic Coating: 24 hours
    b. Graphene Ceramic Spray Coating: 4-6 hours or longer if possible
    c. (Optional) Infrared Cure Lamps can be used to speed up the curing process, but are not required.

Fixing Application Issues - High Spots, Streaks, Sweat Beads, Chalkiness, and more

Even the most professional ceramic coating installers can and will run into a few minor issues when applying a coating, so don’t feel bad if this is your first attempt applying a coating or your 50th vehicle that you’ve coated and you run into a few hiccups. It’s probably safe to say that 95% of coating applications will have at least 1 or 2 missed high-spots, meaning a spot where the coating residue was not fully removed and left an irregular look to that area - usually appearing as a rainbow-like smear or streaking if it was only partially wiped away, or sometimes even tiny bubbles of coating that look like sweat beads if the coating was completely missed in an area when wiping away.

The amount of time that these high-spots and irregularities remain on the surface will determine how easy or difficult they are to fix and remove. Below are some time examples and recommendations on how to fix the issue:


  • After 1-2 hours: A microfiber towel slightly dampened with a very small amount of water may remove the high-spot. A drop of two of Graphene Ceramic Coating poured into the applicator or a mist of Graphene Ceramic Spray Coating into the applicator, wiped onto the surface, and then immediately wiped off will usually remove the high-spot or streaking.
  • After 4 hours: A drop of Brilliant Glaze or white Polish gently wiped on with a microfiber towel and then immediately buffed off should remove the high-spot or streaking.
  • After 12 hours: A drop of Brilliant Glaze or white Polish applied with a Blue Hex Grip Applicator or Microfiber Applicator and then immediately buffed off with a microfiber towel may remove the high-spot or streaking. Slightly more pressure with the applicator might be necessary to remove the defect. Machine polishing with a White Foam Pad and white Polish might be necessary to remove the high-spot or streaking; however, this could weaken the fresh coating, so you may want to re-coat this area afterward.

After 24-48+ hours: Machine polishing with a White Foam Pad and white Polish might be necessary to remove the high-spot or streaking; however, this could weaken the fresh coating, so you may want to re-coat this area afterward. Machine polishing with a Microfiber Cutting Pad and Compound will remove the high-spot or streaking but you will need to re-coat this area afterward.

Watch the video below for more information on fixing your application issues.


Do's and Don'ts of Graphene Ceramic Coating

The following is a summary of things you should and should not do with respect to the application process and the first week after application:  


  • Do allow Graphene Ceramic Coating to cure indoors for a minimum of 24 hours before exposing to moisture, water, or any liquid.
  • Do allow Graphene Ceramic Spray Coating to cure, preferably indoors, for a minimum of 4-6 hours before exposing to moisture, water, or any liquid.
  • Do level and wipe coatings from all surfaces after proper flash-time - paint, glass, chrome, plastic, fabric, etc.
  • Do spot check the entire vehicle for high-spots after wiping away the flashed coating residue, by temporarily moving the vehicle out into natural sunlight and then moving it back into the garage. An overcast day can also help to see high-spots and streaks on some color vehicles.
  • Do regular maintenance and safe washing, outlined in the next section.
  • Don’t apply a coating in a very cold or very hot environment. Temperatures in the 60-80F range are preferred if possible for easier application and removal.
  • Don’t wash or clean the vehicle with any shampoos, soaps, or cleaners for 5-7 days after applying Graphene Ceramic Coating or Graphene Ceramic Spray Coating.
  • Don’t apply a coating to an older pitted windshield. This can cause glare from sunlight and headlights.
  • Don’t apply a coating to a surface that has not been properly prepped, discussed earlier. It will not bond properly, last as long, or potentially look as well as it should.

Don’t wipe away the coating residue too early (before it flashes) or too late (when it can be difficult to wipe away and leave smears, streaks, and overlap lines). Review the APPLICATION steps above.

Maintenance Products & Best Practices

Here are a few recommendations on how to maintain your graphene coated vehicle for the best performance and effective life of the coating:

  • Perform regular washes using a shampoo compatible with ceramic coatings. Soaps with carnauba wax additives will not damage the coating, but can cause the coating to clog or not perform as optimally as it should. Compatible products that we offer are:
    • Adam’s Car Shampoo, Mega Foam, Ultra Foam Shampoo, and Wash + Coat
  • Perform maintenance with a topper product every 1-2 months to keep the coating super slick and protected. Our Graphene Detail Spray, Ceramic Boost, CS3, or Rinse + Coat are all excellent options for this.
  • For dust and light dirt removal, CS3 or Ceramic Waterless are both excellent options if you do not wish to perform a full bucket wash, and will help refresh the coating as well.
  • Do not take your vehicle through any type of brush car washes - coatings can and will still scratch!
    • If you must take your vehicle to a car wash, a touchless wash has less chance of damaging the vehicle’s finish.
    • Skip the “sealant” or “wax” step of the wash if you have the option to exclude it.
  • Every few months, or every oil change, you may want to do a wash with Strip Wash and decontaminate with Iron Remover to get back down to the coating level, if it appears to be not as hydrophobic or perform as well.
    • Coatings can become “clogged up” with non-compatible products, contaminants, etc, so a Strip Wash and decontamination can help to bring it back to life.
    • Follow up with a new light layer of Graphene Detail Spray, Ceramic Boost, or CS3 afterward to bring back a super slick feeling as well.
  • (Optional) Every 6 months or so after the coating has been applied, perform a wash, decontaminate, Surface Prep, and then re-apply a fresh layer of Graphene Ceramic Spray Coating to re-up the protection level, for example, for less wear and tear on the coating during harsh winter months or very hot and sunny summer months.