Car Care is a broad topic that can mean different things to different people, but at Adam’s Polishes, we want your car to look its best for years to come. Without the correct processes, you can easily introduce unwanted damage to your vehicle, and without the correct products, the various surfaces and materials can age much faster than if they are properly protected and maintained. In this guide, we’ll show you the roadmap to the fundamentals of detailing - how to keep processes simple, effective, and efficient with your time in order to keep your car shining its brightest. Join us on this two-lane highway of detailing, as we explain the process through easy-to-follow sections and video demonstrations.
Fundamentals
Of Detailing
Introduction
The Core Components Of Safe Washing
One of the main fundamental skills in detailing is how to properly wash a car without introducing damage to the finish. There is no point spending hours machine polishing your car if you are not washing it properly afterward. With the wrong process and wrong tools, you could end up eliminating all of the hard work and time that you spent polishing your car with just one incorrect wash; however, with the right techniques and products, the car washing experience can be more efficient, fun, and a much safer process overall! Since proper washing and drying are the foundation and building blocks of detailing, we’re going to focus a significant portion of this Car Care Guide on these two processes.
Material Prep Saves Time, Increases Safety
The goal of washing your vehicle is to clean it safely to have it looking great, without causing any new issues such as scratches, swirl marks, and water spots. One very important safety measure is to prepare all of your washing gear first, before you even turn on the water hose. Gather the necessary wash chemicals, wash pads, brushes, towels, and accessories, and organize them neatly in an easy-to-reach area, such as a detail cart. Running in and out of the garage to grab that wheel brush or your drying towel that you forgot adds time to the wash and may indirectly cause you to rush with less caution and care. This means there is more chance of wash-induced damage, such as marring and swirl marks in the paint…or worse! Let’s take a look at our first process flow chart and then jump right into the proper wash process.
Before Putting Water to the Vehicle - Wheels/Tires, Exhaust Tips, and Engine Bay First!
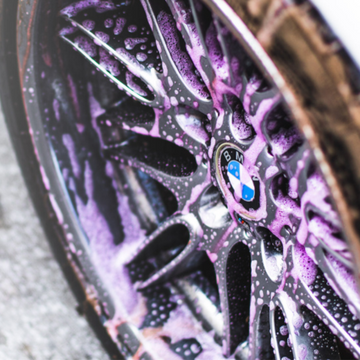
With everything organized and ready to go, we start the wash process by cleaning wheels and tires first. Many may think this is backwards, but here is why we feel this is the best way to start washing your car: You want standing hard water contacting the vehicle surface as little as possible - the longer hard water sits on paint, glass, and chrome, the higher chance that the minerals and impurities leave water spots on those surfaces, that can be difficult to remove. If you wait to clean wheels and tires last, then you have standing water on the other areas of the vehicle, not to mention the chance of pulling grime from the tires and wheel wells back onto body panels that you had already cleaned, which means more time and re-work.
Have a bucket nearby, filled with clean water so that you can clean the brushes out in between each wheel, and so that your brushes aren’t laying on the ground picking up dirt and debris. Click here to see how Adam Pitale, our Founder and Chief Detailer, demonstrates the proper wheel and tire cleaning process: How To Effectively Clean Your Wheels And Tires
With the wheels and tires clean, we can then move onto cleaning the engine bay - another area where we are not introducing hard water to the paint. We’ll utilize the same chemicals and brushes that we used in the wheel and tire cleaning bucket. Tire & Rubber Cleaner makes an excellent engine bay degreaser, and the various wheel and fender brushes provide access to clean tight and difficult-to-reach areas in a safe manner. Adam shows the process for modern engine bays here: Why and How Should You Clean Your Engine? Then once you have cleaned and dressed the engine bay, the final step before moving onto washing the body panels and glass is to clean the exhaust tips. Use the same Wheel Cleaner or Tire & Rubber Cleaner that you used when cleaning wheels to clean the exhaust tips with an Angled Wheel Brush to clean around and inside of the tips. You can then use our Metal Polish to shine them up like new. If there are heavy amounts of stubborn carbon and soot build-up from exhaust residue, you can use #0000 Steel Wool with the metal polish for more aggressive cleaning.
Safe Washing Process - Grit Guards, Two Bucket Wash, and pH Neutral Soap
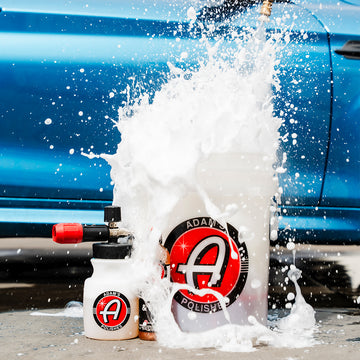
We’re now ready to begin the wash process. Washing your car is arguably what you spend the most time doing when it comes to car care and detailing, so it is critical that you have a safe process so that you are not scratching your car while washing. Processes and technology have advanced far beyond using an old dirty sponge with some dish soap and a beach towel to clean your car. We always stress that you use a Two Bucket Wash Method with Grit Guards when washing your vehicle. If you’re wondering what a Grit Guard is, or why you need 2 buckets, we’ll explain both now. A Grit Guard is a grate filtering tool that sits at the bottom of your buckets. As you scrub your wash pad or wash mitt against the grated surface, dirt and contamination fall to the bottom of the bucket. The Grit Guard has vertical slats that keep the water from sloshing around, causing all of the dirt particles to stay at the bottom of the bucket and out of your wash pad.
The reason for having two buckets is to have one Soap Bucket, filled with water and your preferred Adam’s shampoo, and a second Rinse Bucket, filled with clean water only. By doing this, you scrub the dirty wash pad in the Rinse Bucket, leaving sediment and dirt particles in the Rinse Bucket, and then reload it with suds from the Soap Bucket. Using this technique frequently throughout the wash ensures that you are never reintroducing dirt back onto the vehicle, and therefore reducing the chances of scratches. Always pre-rinse the vehicle first to remove heavier dirt, mud, and other contamination, starting with areas in the shade first and then moving onto areas in direct sunlight - to reduce the time that hard water is baking in the sun. Once you begin to wash, do the opposite - clean areas in the sun first, then areas in the shade.
All of our car washing shampoos are pH neutral, which means that they will rinse spot-free even if they begin to dry on the surface. Wash in straight lines rather than circular motions to avoid putting swirl marks into the paint. Use the Grit Guards often to scrub out dirt and debris from the wash pad to further reduce the chance of scratches - scrubbing out the wash pad after each panel is good practice. Finally, do not rinse the soap residue until you have washed the entire vehicle, then rinse shaded areas first and then sunny areas to have standing hard water on the surface for as short of a time period as possible. Click the link below to watch Adam walk you through our safe washing process: How To Wash Your Car Without Scratching
Drying Aids, Safe Drying Towels, and Air Cannons
Incorrectly drying a car is another main cause of swirl marks and scratches in paint. Cotton bath towels are not soft enough for paint and clear coat, so save them for the bathroom and the beach. Chamois can be effective but are very thin - they can easily pick up a stray piece of debris or sediment, drag it across the surface, and cause scratches. Using a clean and plush microfiber drying towel is a much better option to dry the vehicle, and the best option is to use a forced air blower. The less you touch the vehicle, the less chance of scratches, so an air blower with filtered and heated air like the Air Cannon allows you to quickly and safely dry the majority of the vehicle while also taking care of trouble areas like mirrors, door handles, emblems, and other components where water continues to drip out no matter how many times you wipe the spot.
Then you can follow up with a drying aid and a microfiber drying towel to take care of any other remaining streaks and drips around the vehicle. If you’re wondering “What is a drying aid?”, it is a quick detailer type of spray that is used to assist in drying the vehicle by lightly misting it onto a panel and then wiping over the area with your microfiber drying towel. Our Detail Spray is our easiest to use drying aid, gives excellent streak-free results, and is safe for use with waxes, sealants, and ceramic coatings. For a more robust protection option that seals while you dry, check out the application process of our H2O Guard & Gloss here:How To Dry And Seal Your Car At The Same Time
Pro Tip: Dealing With Bird Droppings
We’ve all had to deal with it at some point - you walk out to your nice clean car only to find bird droppings splattered all over the hood, door panel, etc. The instinct for many people is to grab a napkin out of the glove box or a paper towel from the garage and wipe it away, but please do not use these! Paper towels and napkins will instantly scratch or haze the paint and make things worse. Instead, use Waterless Wash or Detail Spray on the stream setting of the spray nozzle to blast away as much of the bird droppings before wiping with a microfiber towel. Then gently wipe with a plush microfiber towel. Bird bombs contain tiny rocks and other pieces of sediment that can easily scratch your car, as well as acids that can stain and etch paint quickly, so always remove them asap rather than letting them sit and cause more damage!
Dressing Tires and Trim
Your car is now clean and dry, but there are a few more things remaining to finish out the detail to have
There is one more thing that we need to protect on the exterior - the tires. There are many different tire dressing options out there. Many are greasy high-gloss tire shine products that pick up dirt or sling onto the sides of your car, and that is something we want to avoid. The reason we do a thorough cleaning of the tire first is so that our tire dressing options adhere properly in a thin even layer with a nice, fresh look. Click here for a quick process video on how to treat different types of tires and the different looks that you can achieve:How To Properly Dress Your Tires | Adam's Tire Shine and Graphene Tire Dressing™
Summary
We hope that by reading this article you learned a few new skills and techniques to make detailing your car an easier, safer, and more enjoyable process. By learning the right fundamental methods for the core detailing topics - preparing your gear, why you clean wheels, tires, and engine bay first, safe washing and drying processes, and treating tires and trim - you’ll have all of the building blocks and tools you need to move into the more involved stages of detailing. We’ll jump into paint correction and protection in the next part in this Car Care 101 series. If you are uncertain about any product or process, or have any questions in general, feel free to contact us at tips@adamspolishes.com, or reach us on our online communities on Adamsforums.com, Instagram and Facebook, as well.
